A Blue Like No Other

Blue skies, blue water, blue plants...? No. No blue plants, but some hide a secret that has enchanted mankind for millennia - indigo.

Indigo has been used as a dye for at least 6200 years! Recent excavations in Peru have yielded cloth still recognizably blue. Prior to this discovery, the oldest known examples were Egyptian textiles with indigo-dyed bands from the Fifth Dynasty, roughly 2400 BC. Diverse and geographically separate peoples developed complex indigo extraction and dyeing techniques while many civilizations were still developing permanent agriculture.

Such is the lure of indigo. Because of its fascinating deep blue color, excellent color fastness, and the wide range of colors obtained by combining it with other natural dyes, indigo has been called 'the king of dyes'. No other dye plants have had such a prominent presence in global textile coloration.

Indigo is a pigment derived from the leaves and stems of a variety of species. Much of the world has native plants that contain the chemicals necessary to produce indigo dye but only 8 contain these in high enough concentration to use for production. Even using advanced techniques of chemical analysis, scientists are unable to ascertain the exact species from which the dye was obtained.

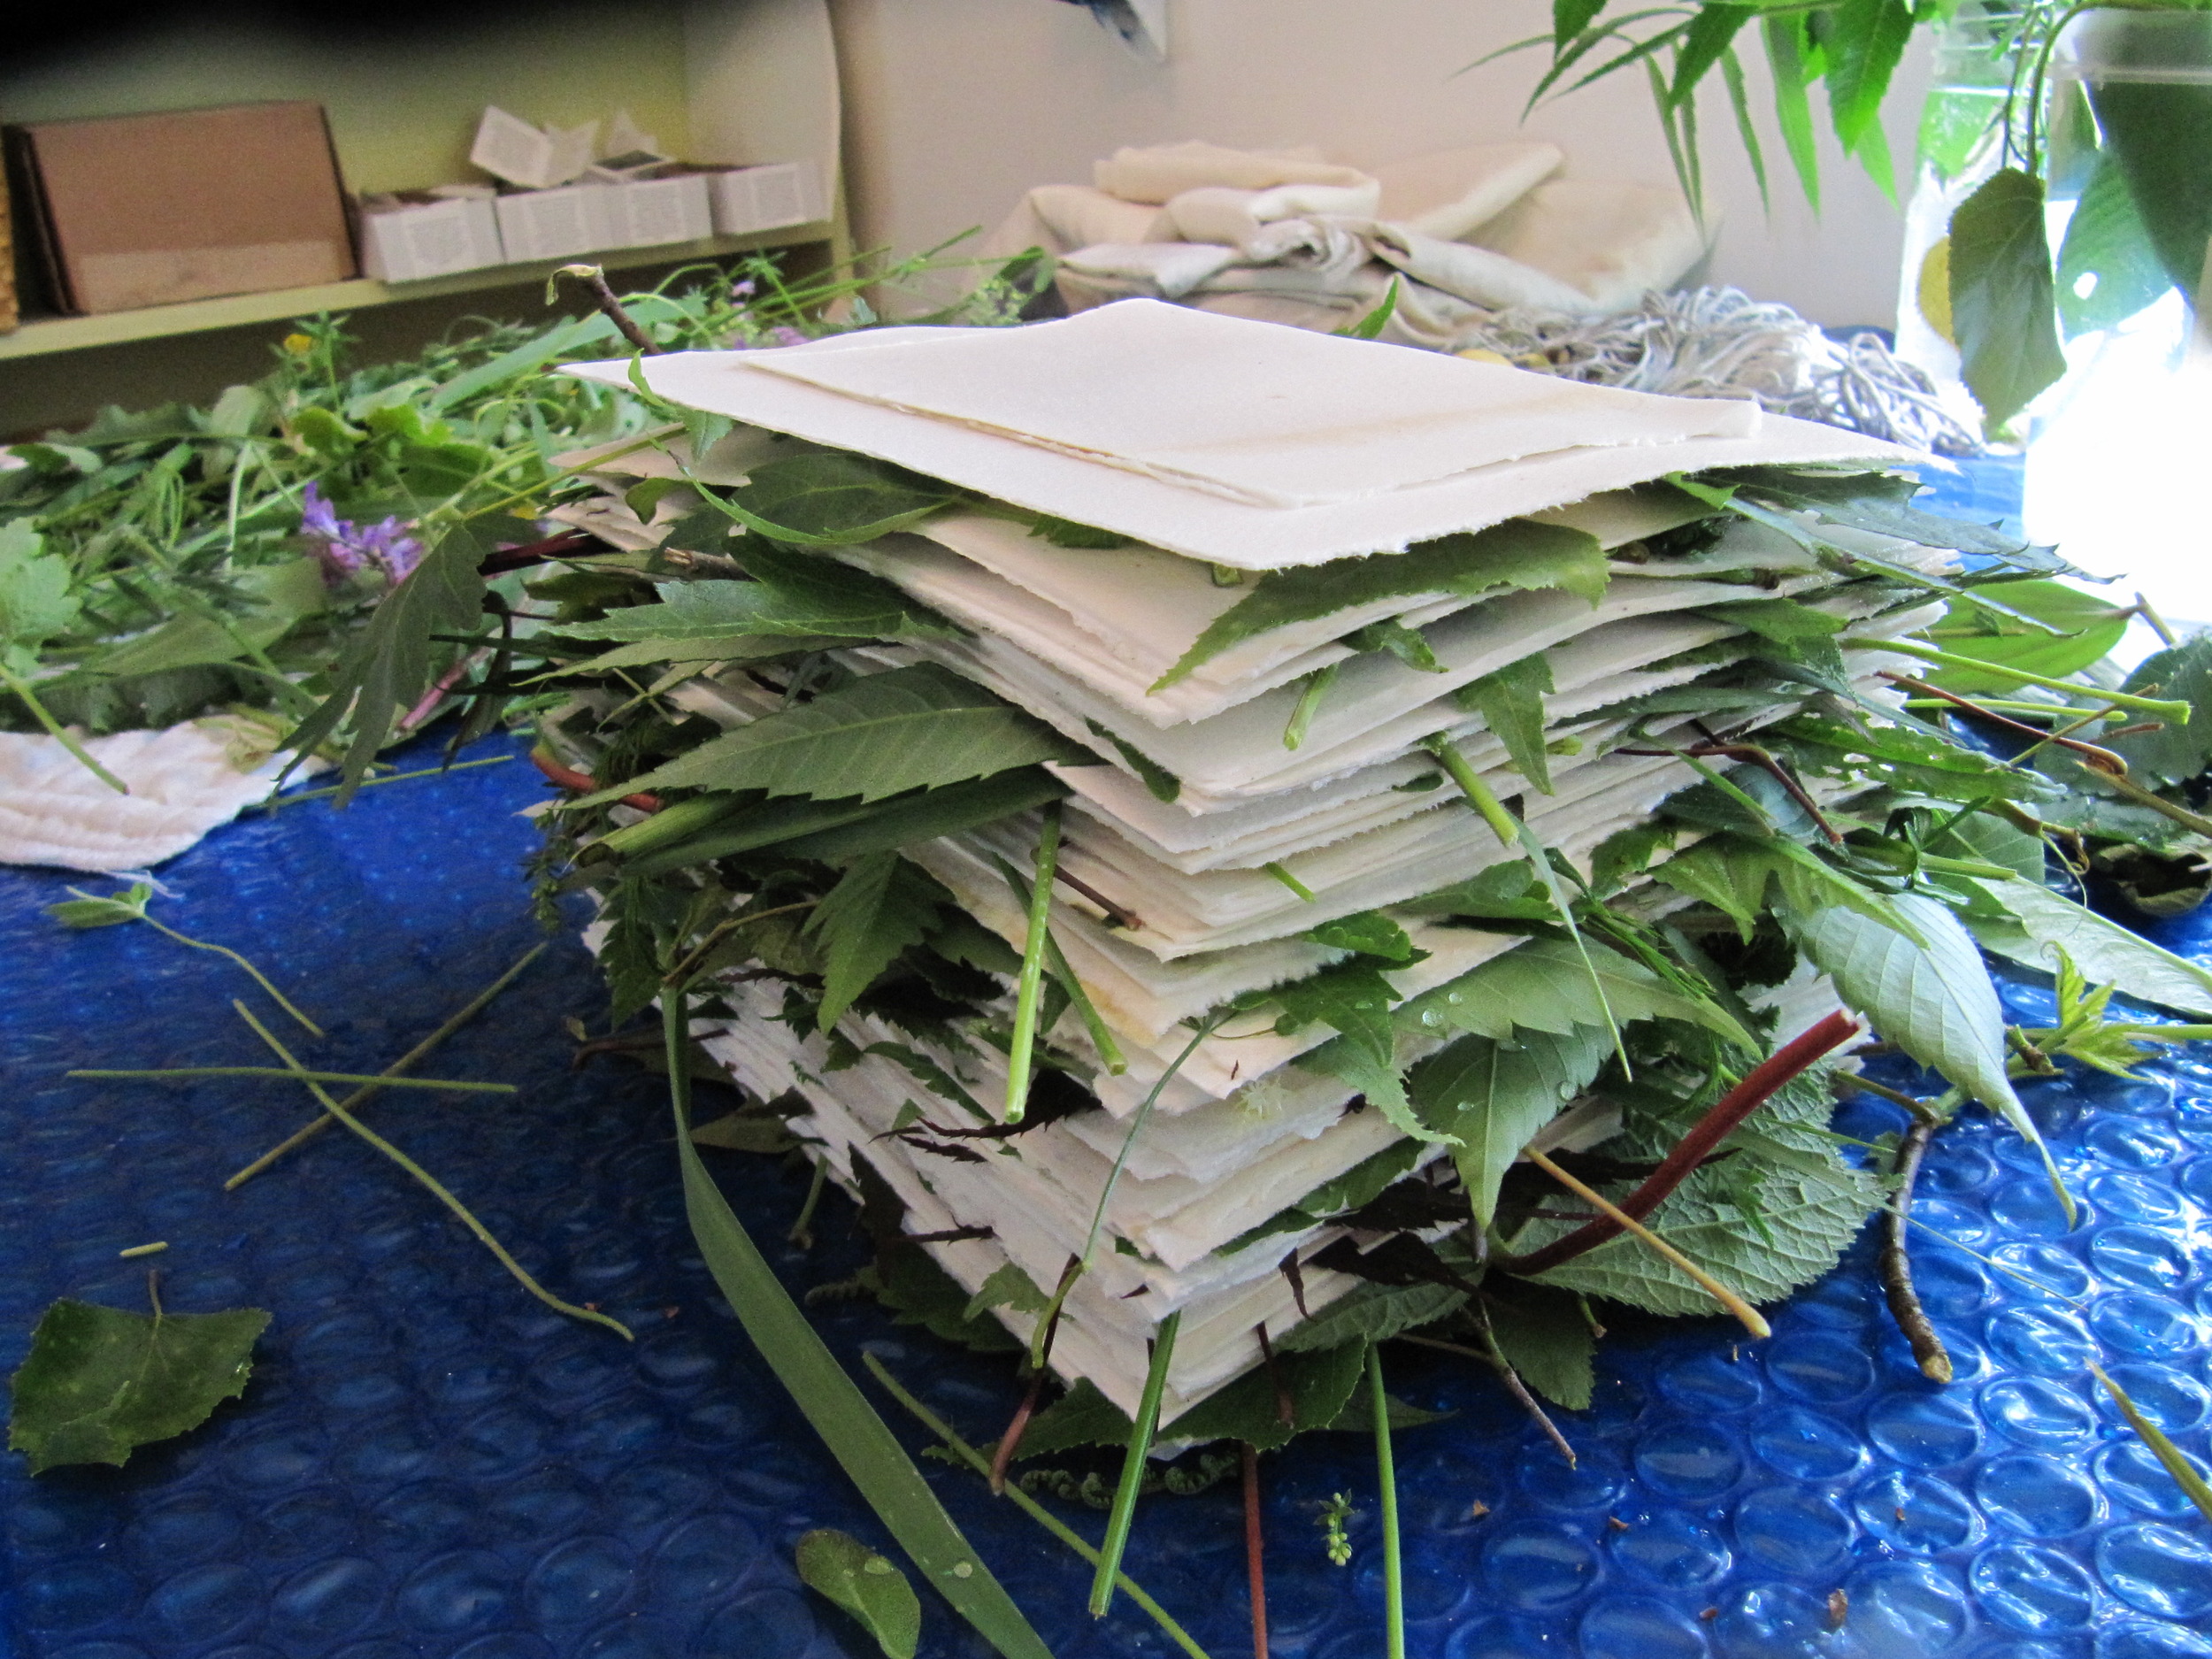
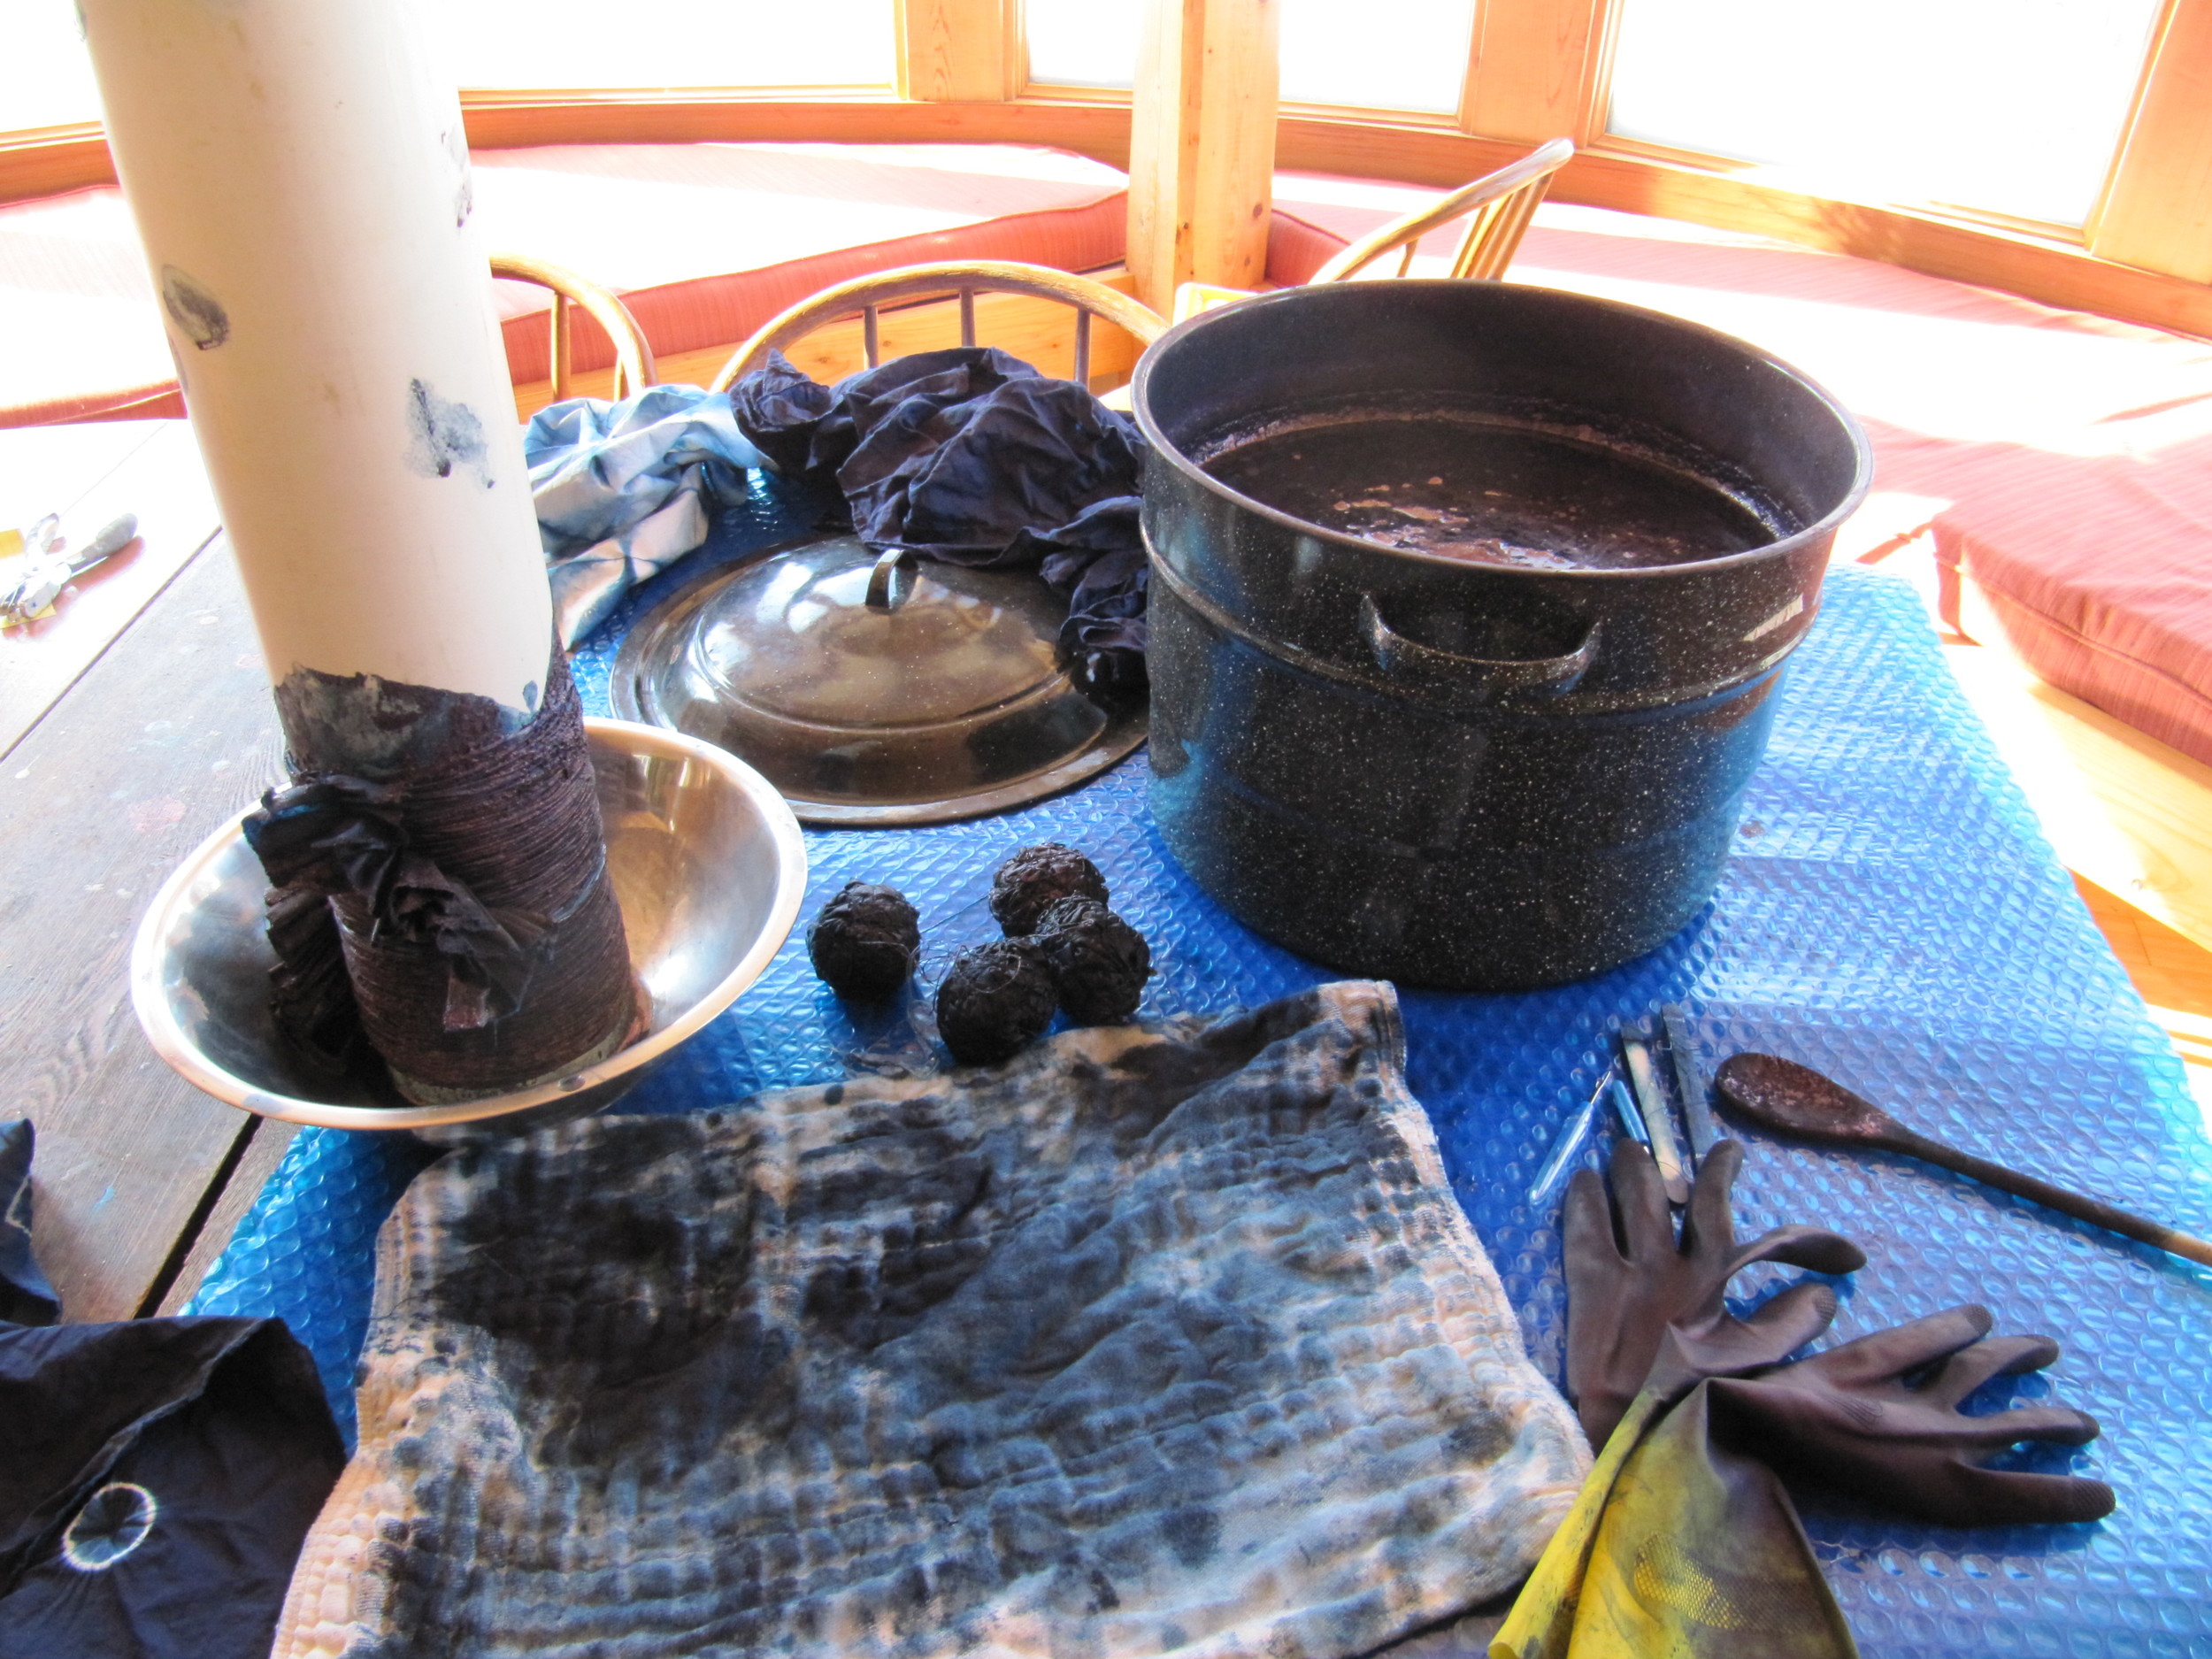
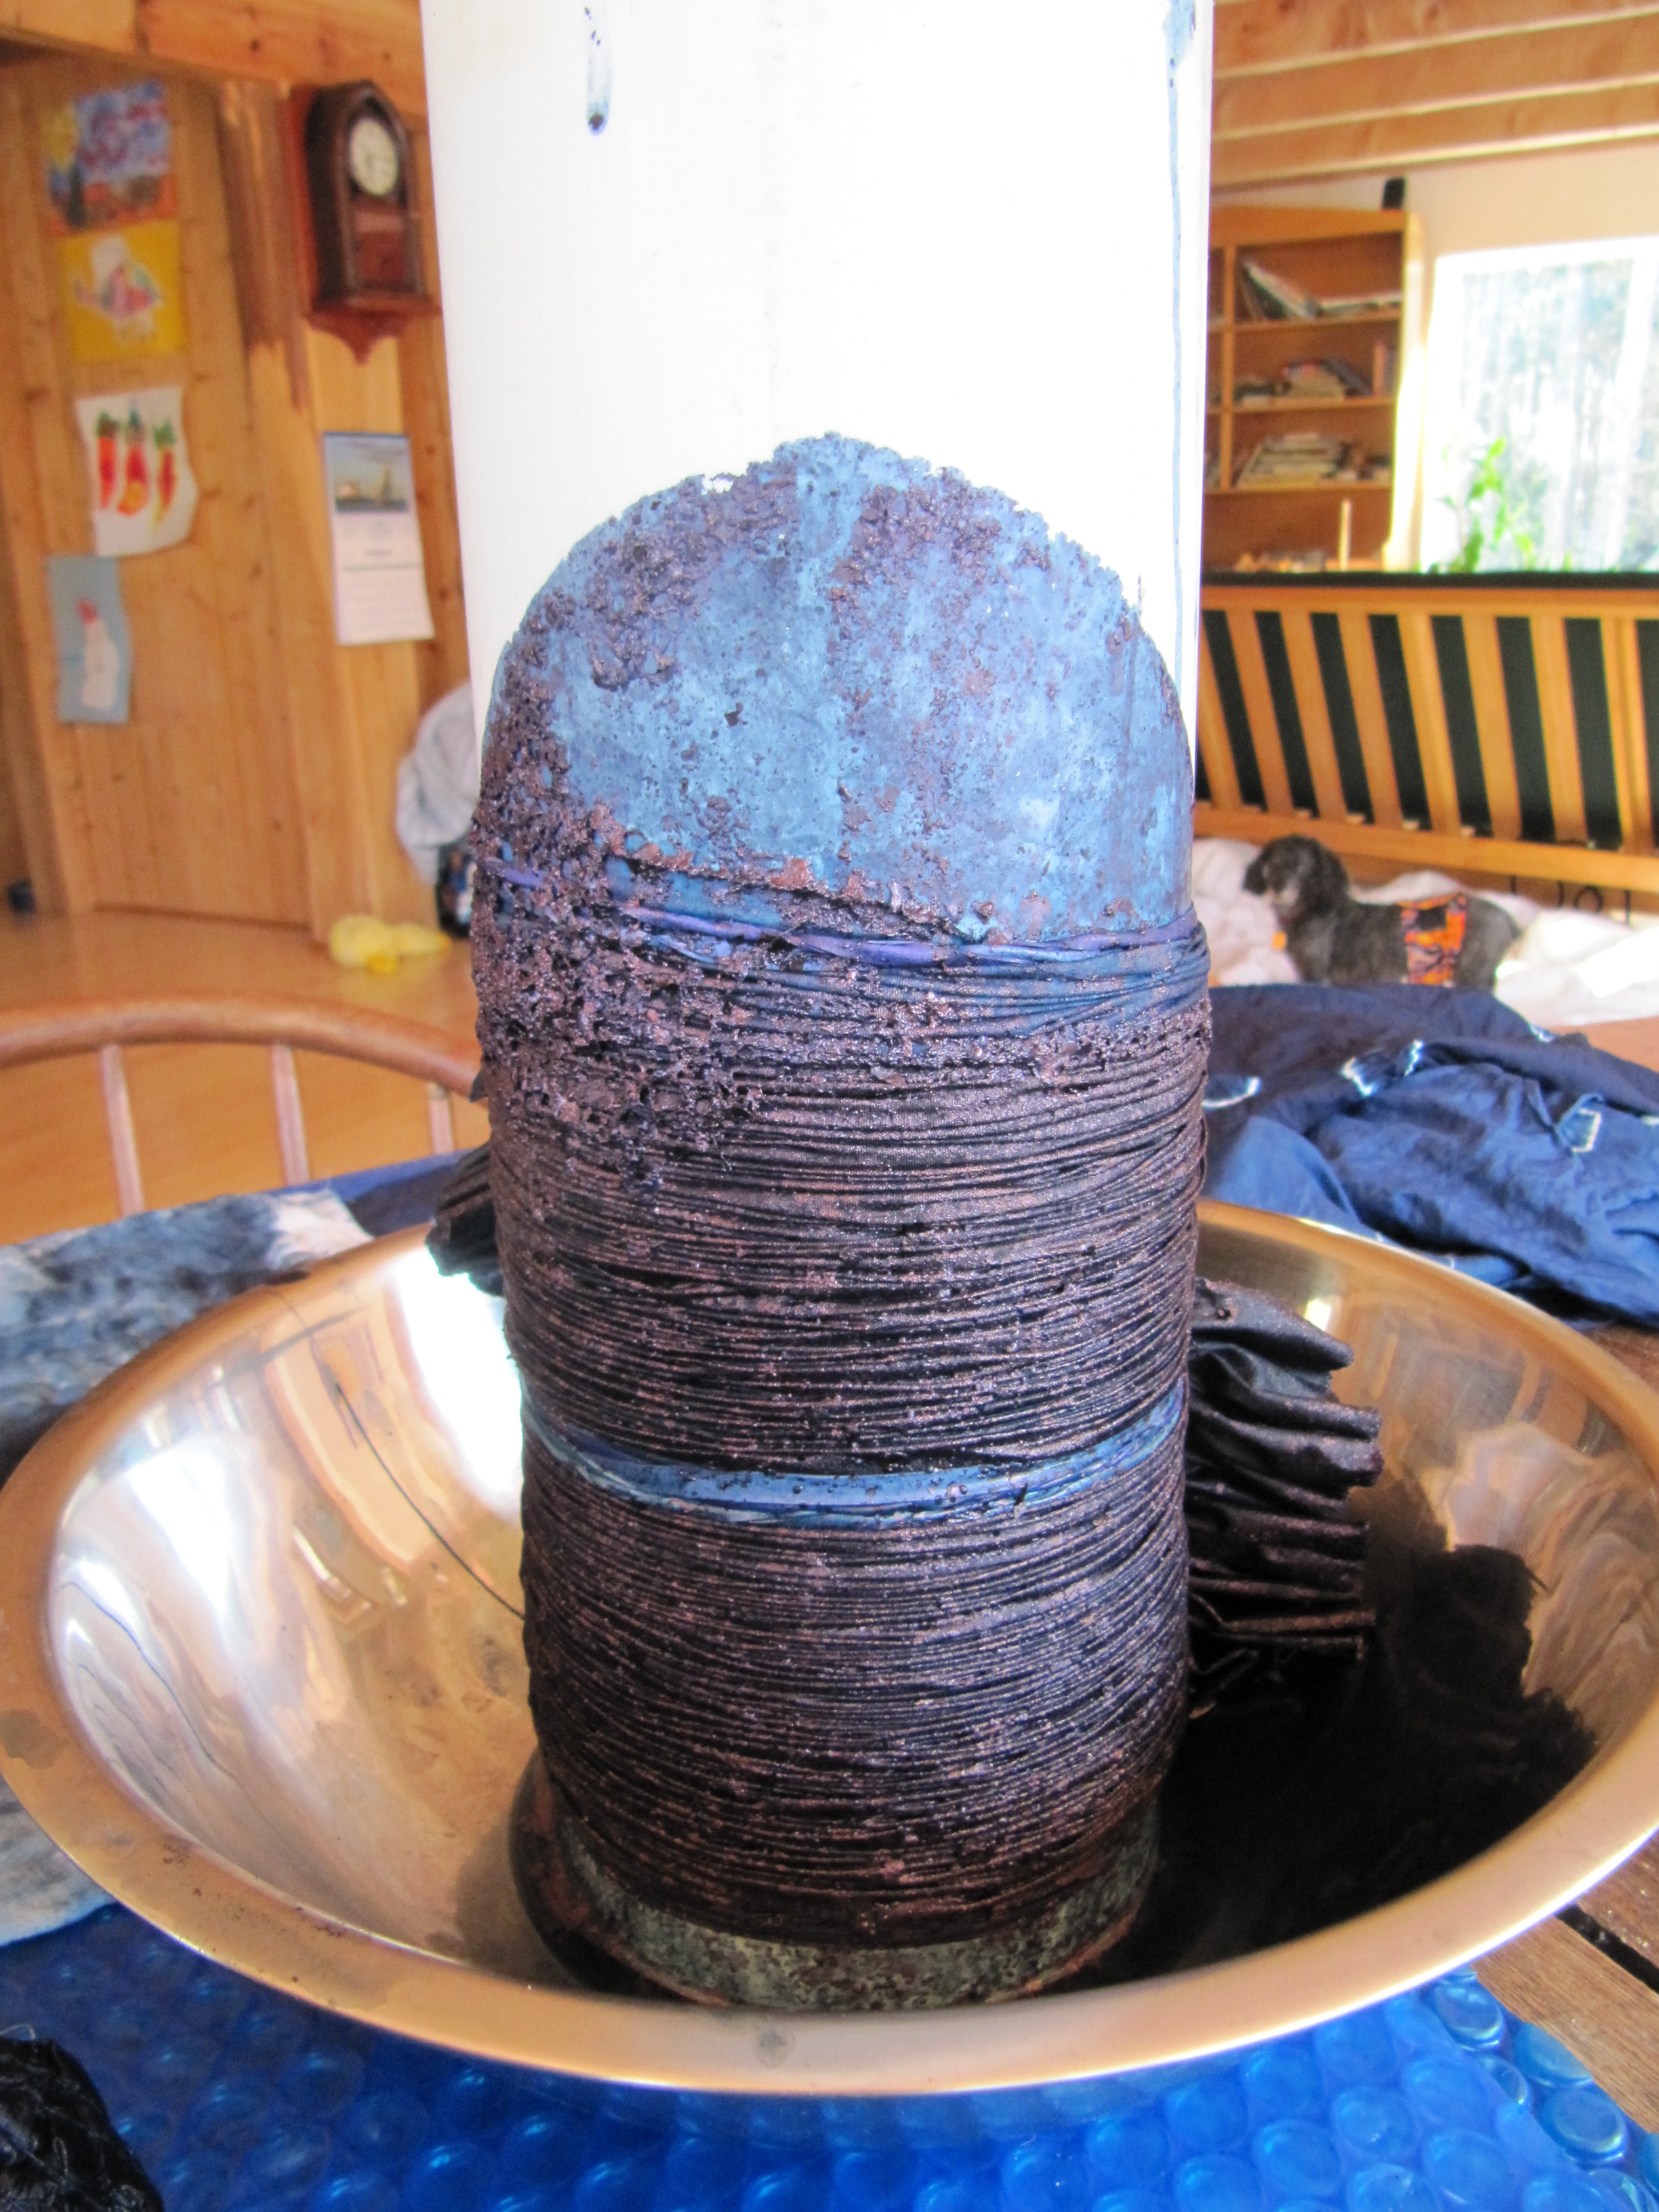
Indigo is extracted from precursor-bearing plants through a lengthy process of fermentation. As a blue pigment, indigo is insoluble in water and must be dissolved in an alkaline solution devoid of excess oxygen (reduced) to allow the dye to penetrate cloth. When the fabric is removed from the vat and exposed to oxygen the color changes from yellow-green through turquoise to a permanent blue. Color must be built up in layers through multiple dips in the vat.

Indigo is one of only a few dyes which can dye all types of natural fibers without the addition of a mordant, a chemical used to create a permanent linkage between the color and the fiber, and is active at room temperature making it ideal for resist techniques.

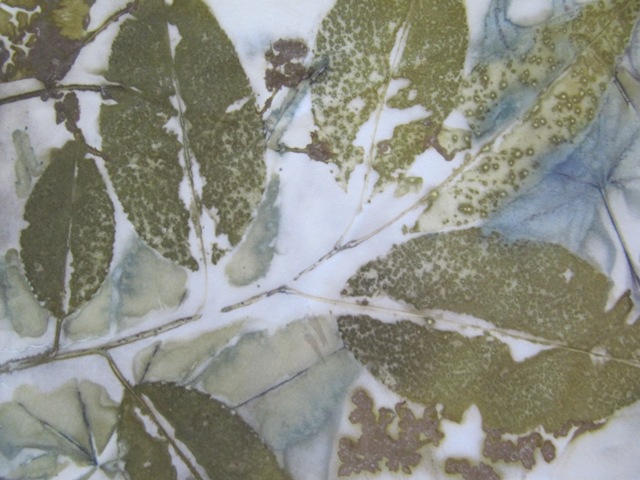
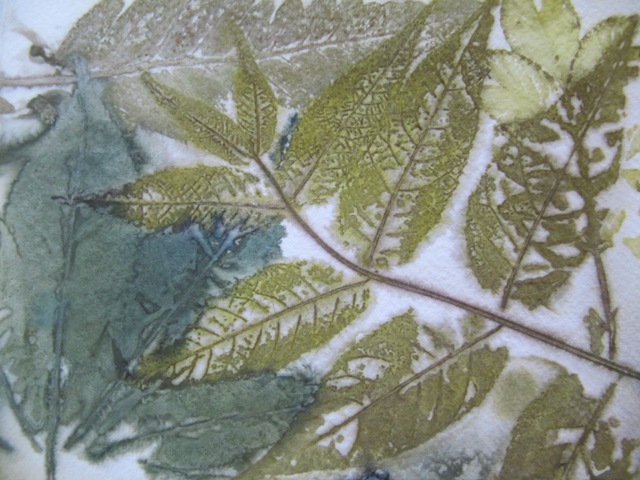
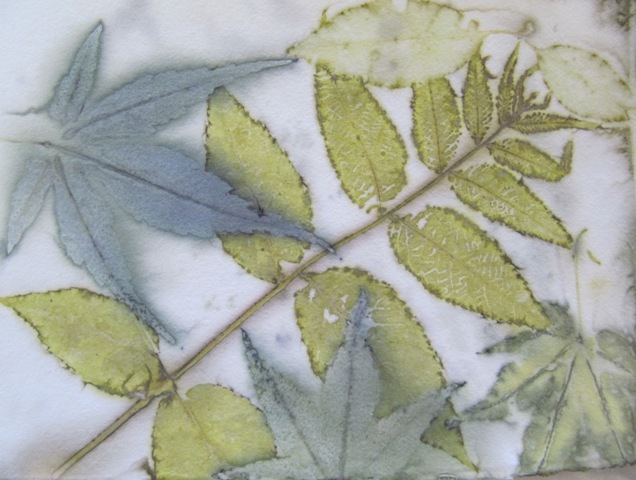
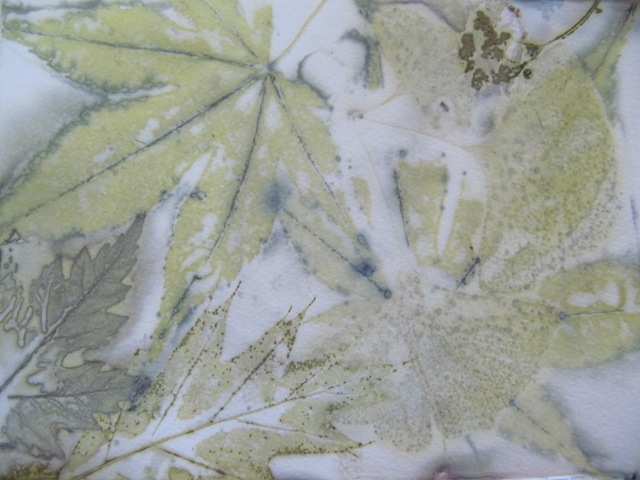
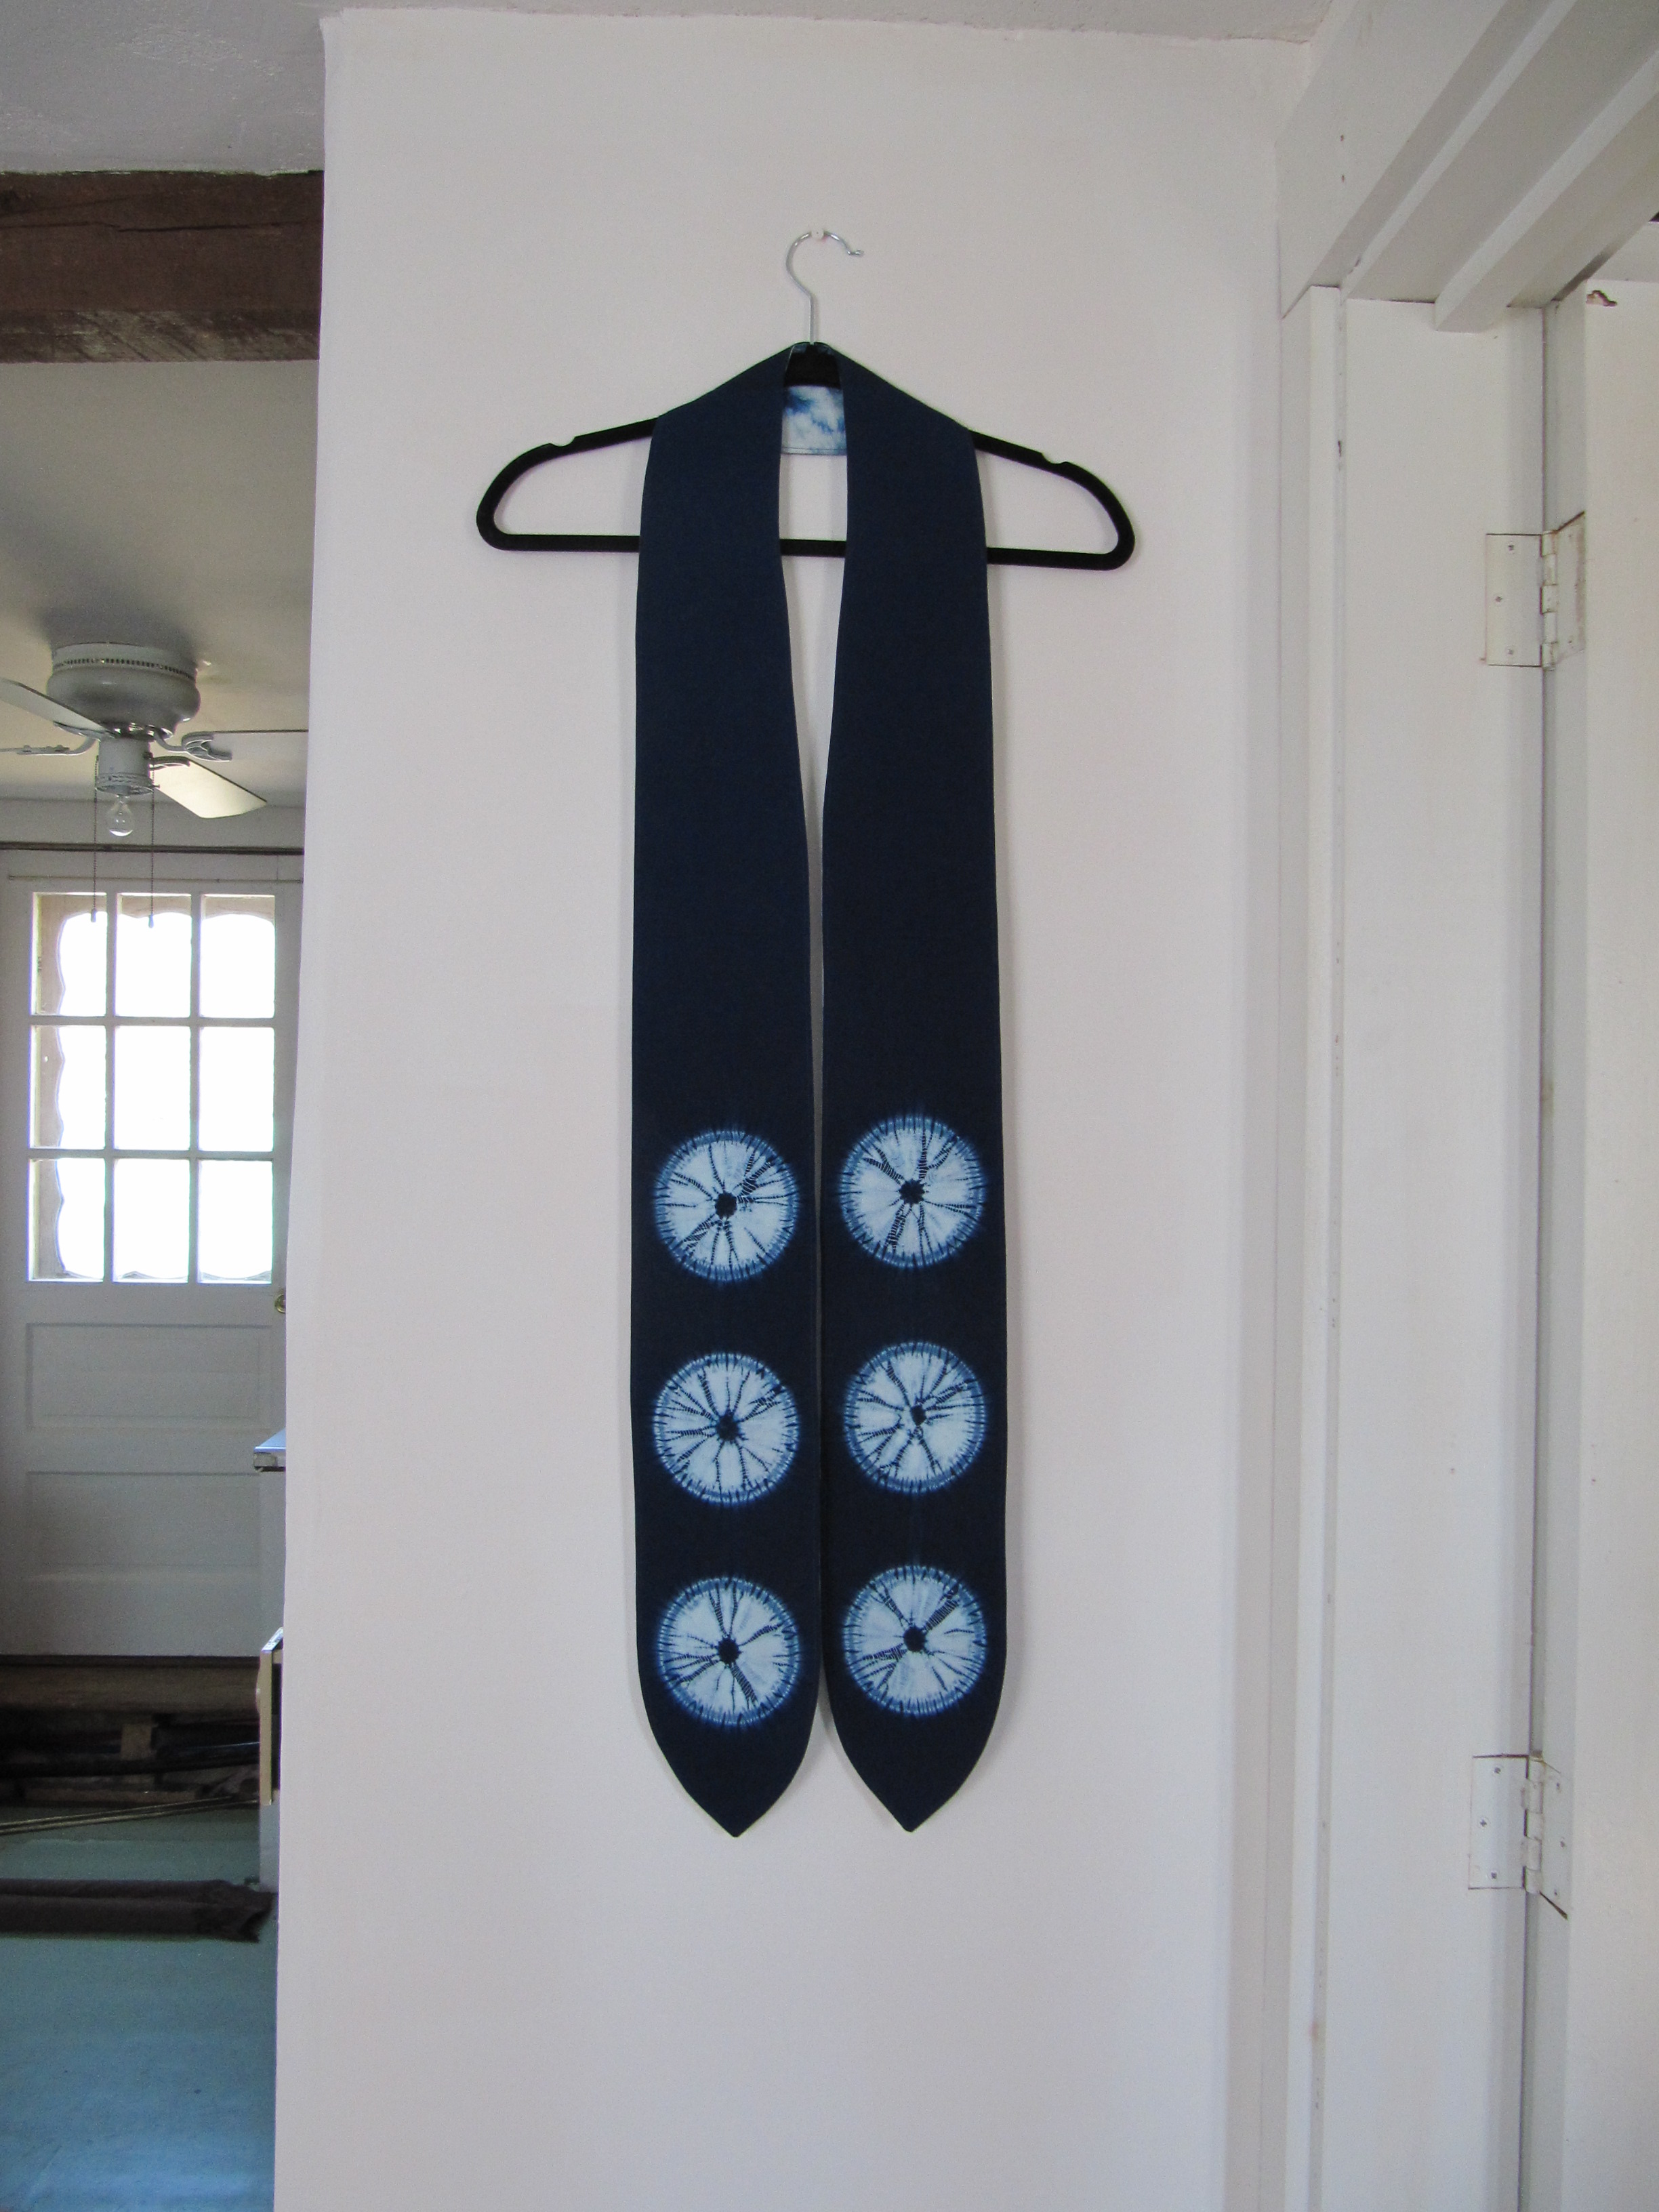
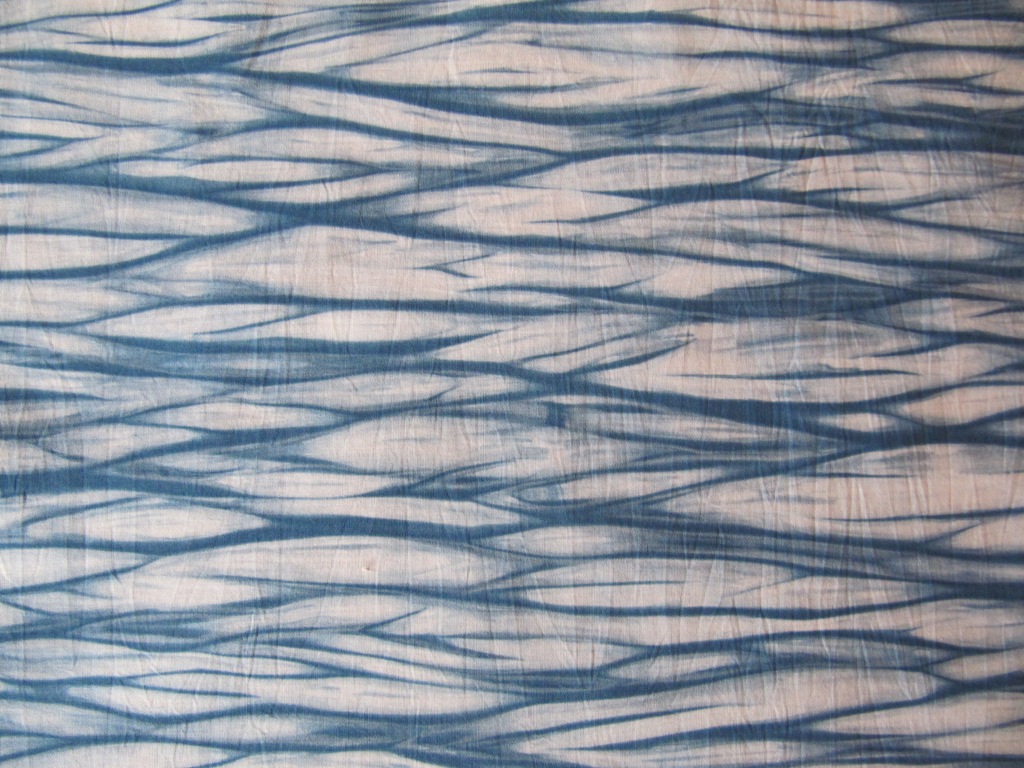
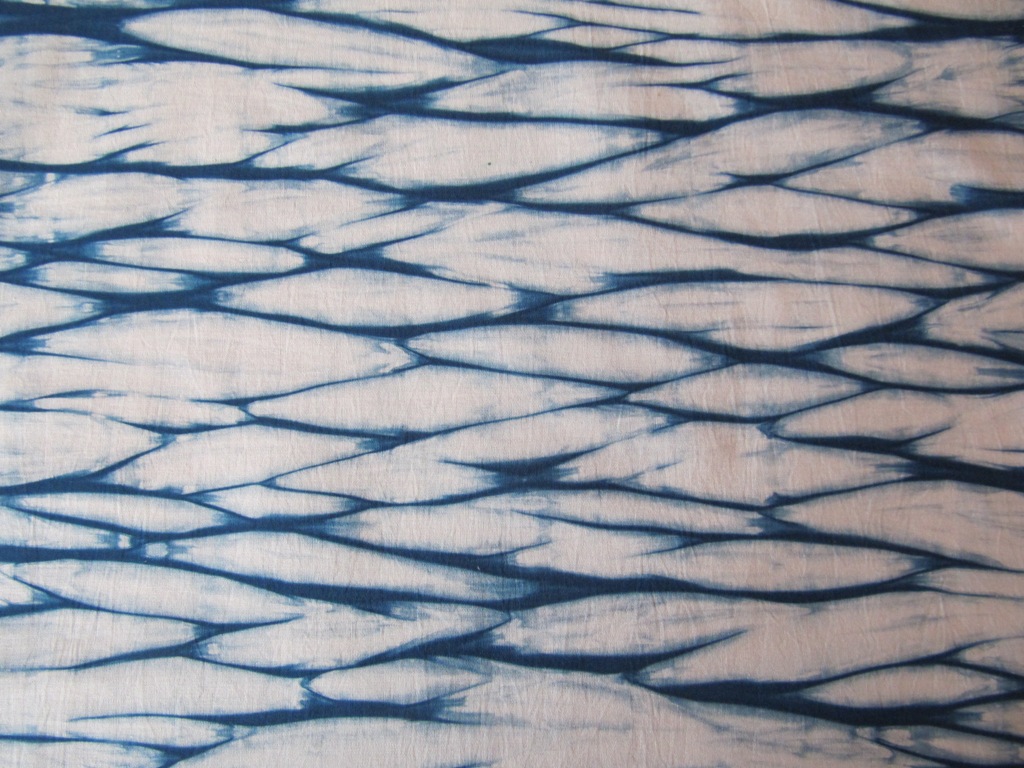
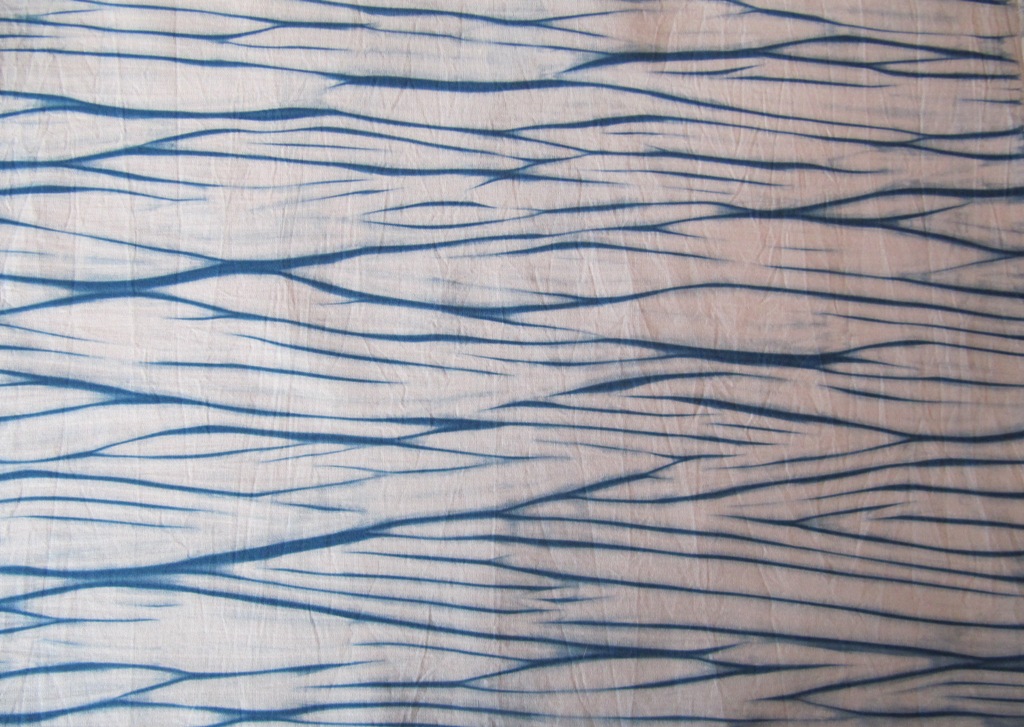
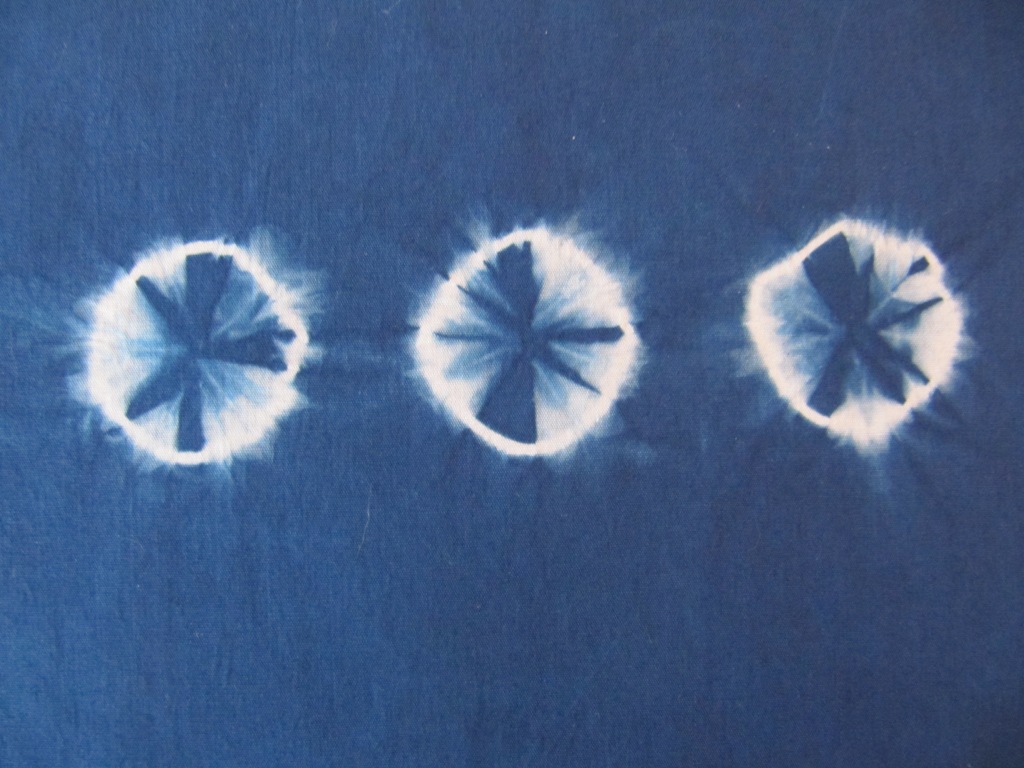
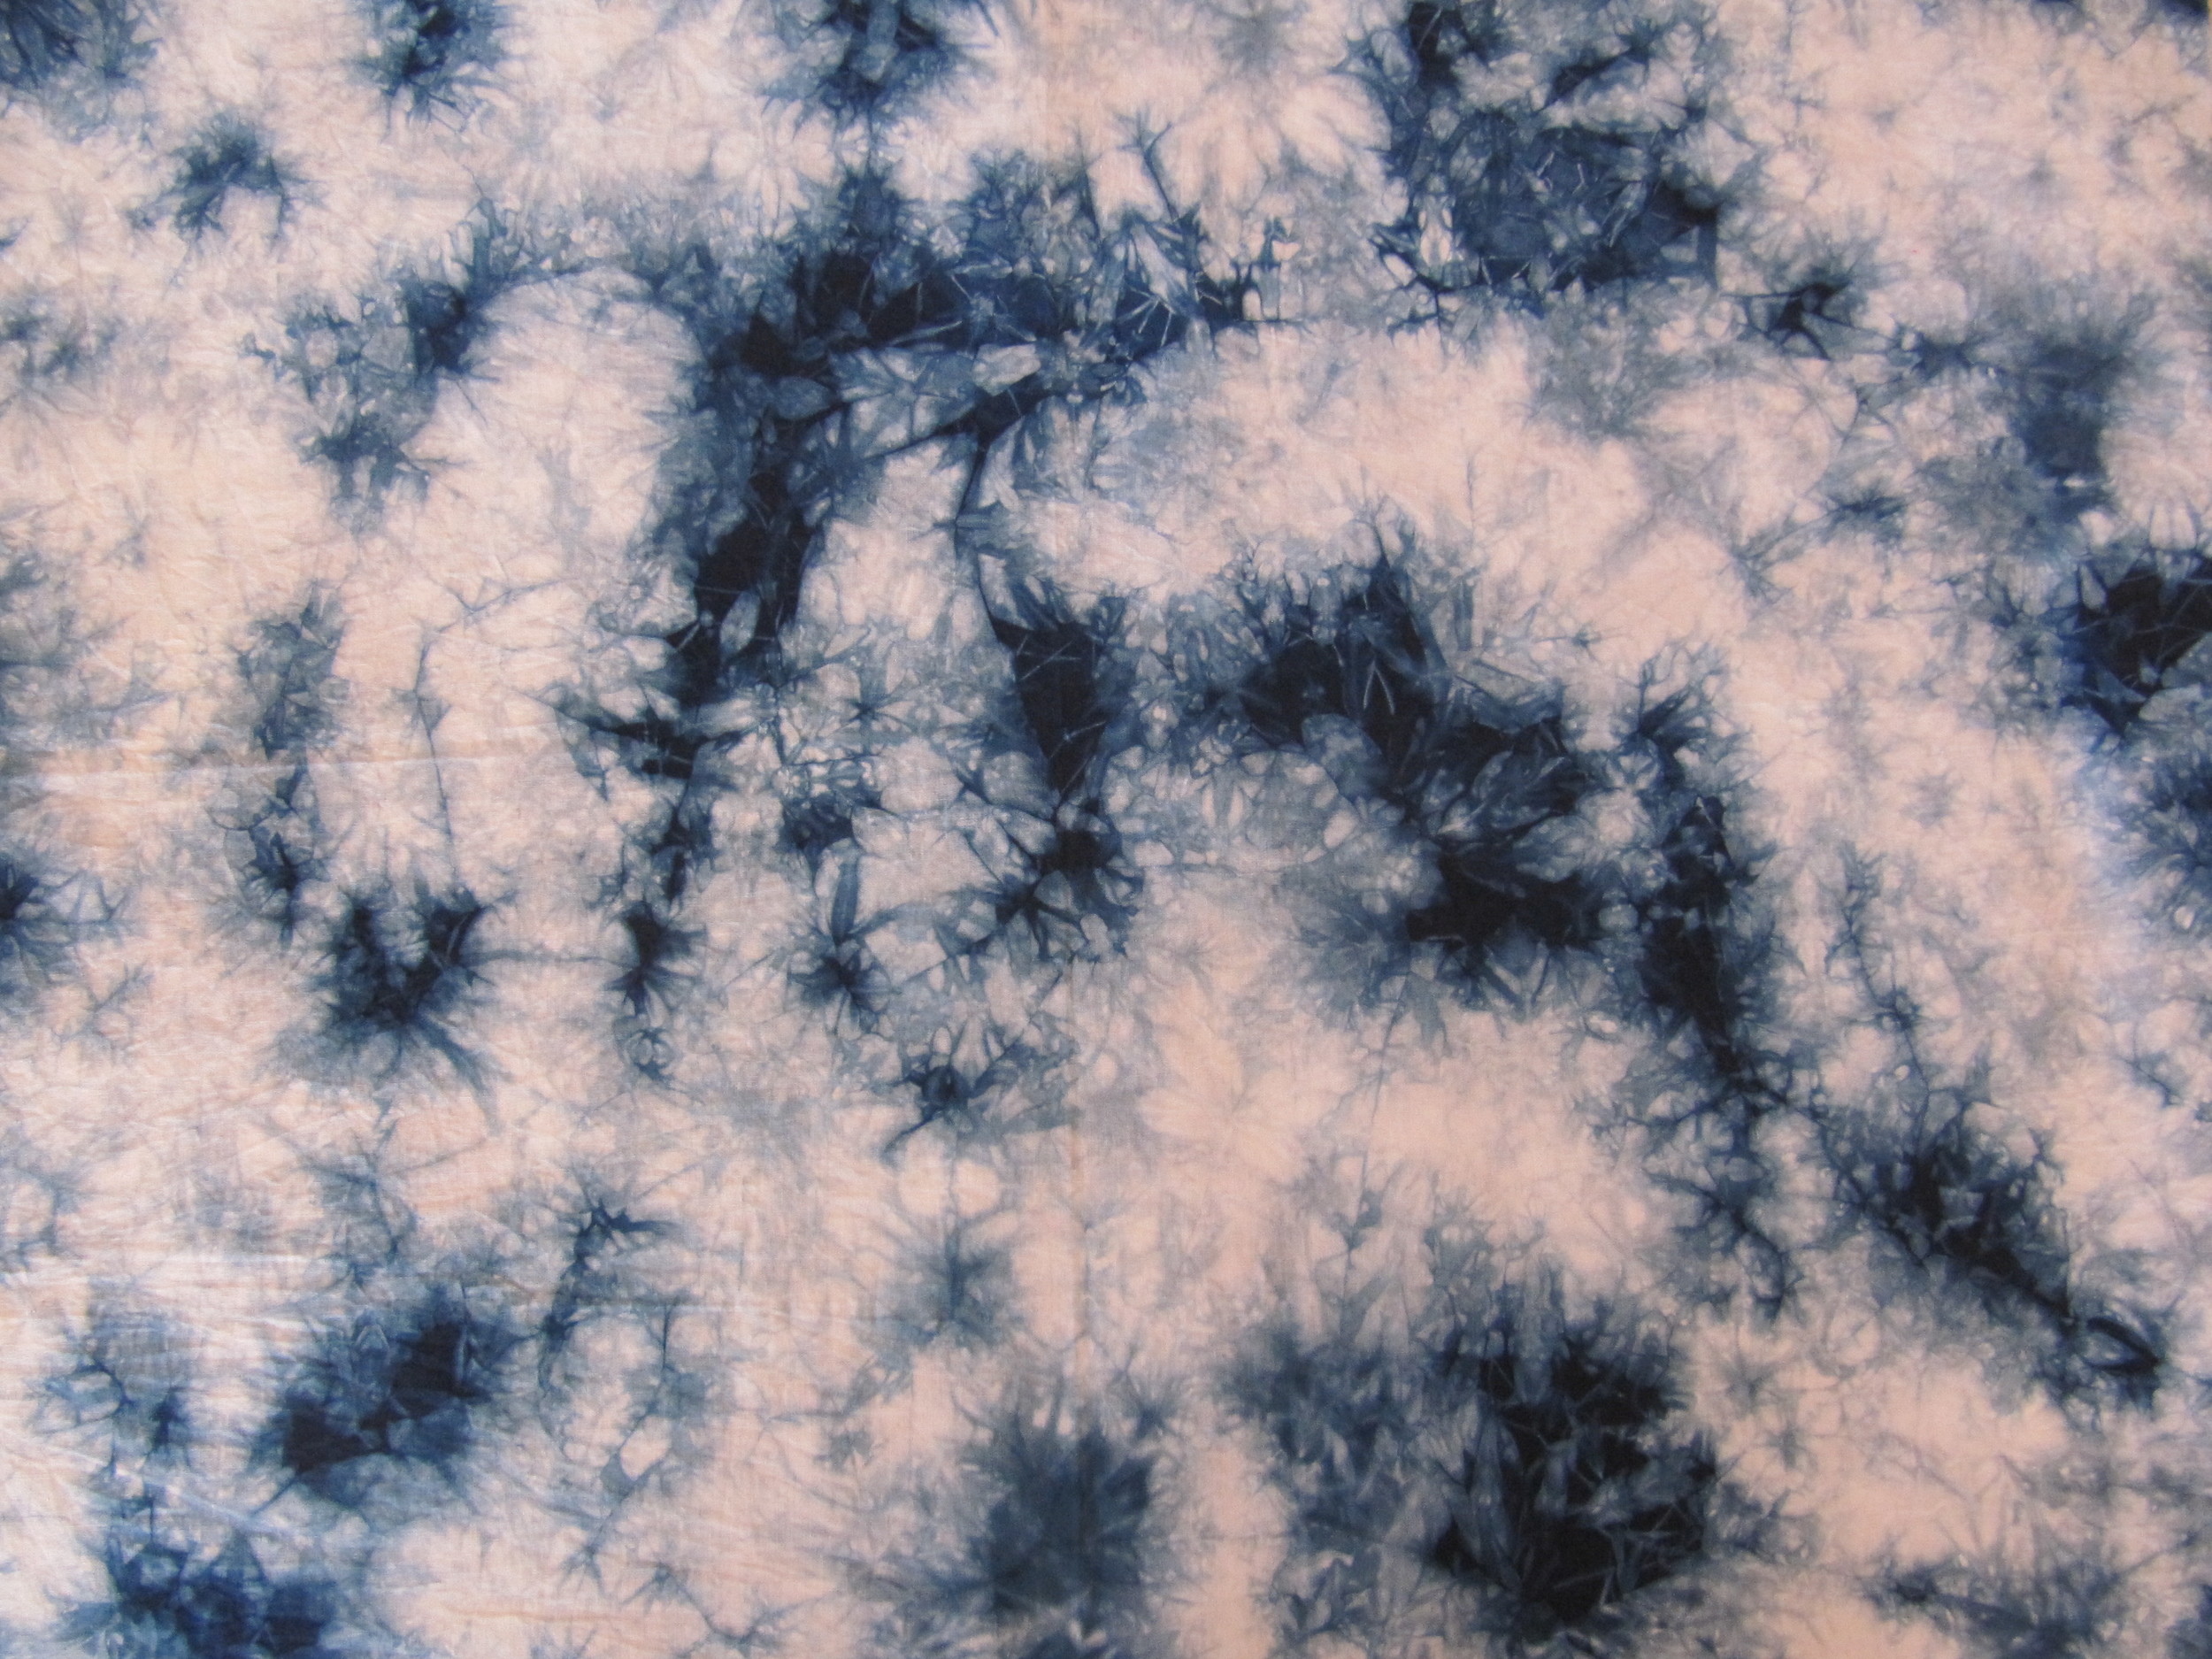
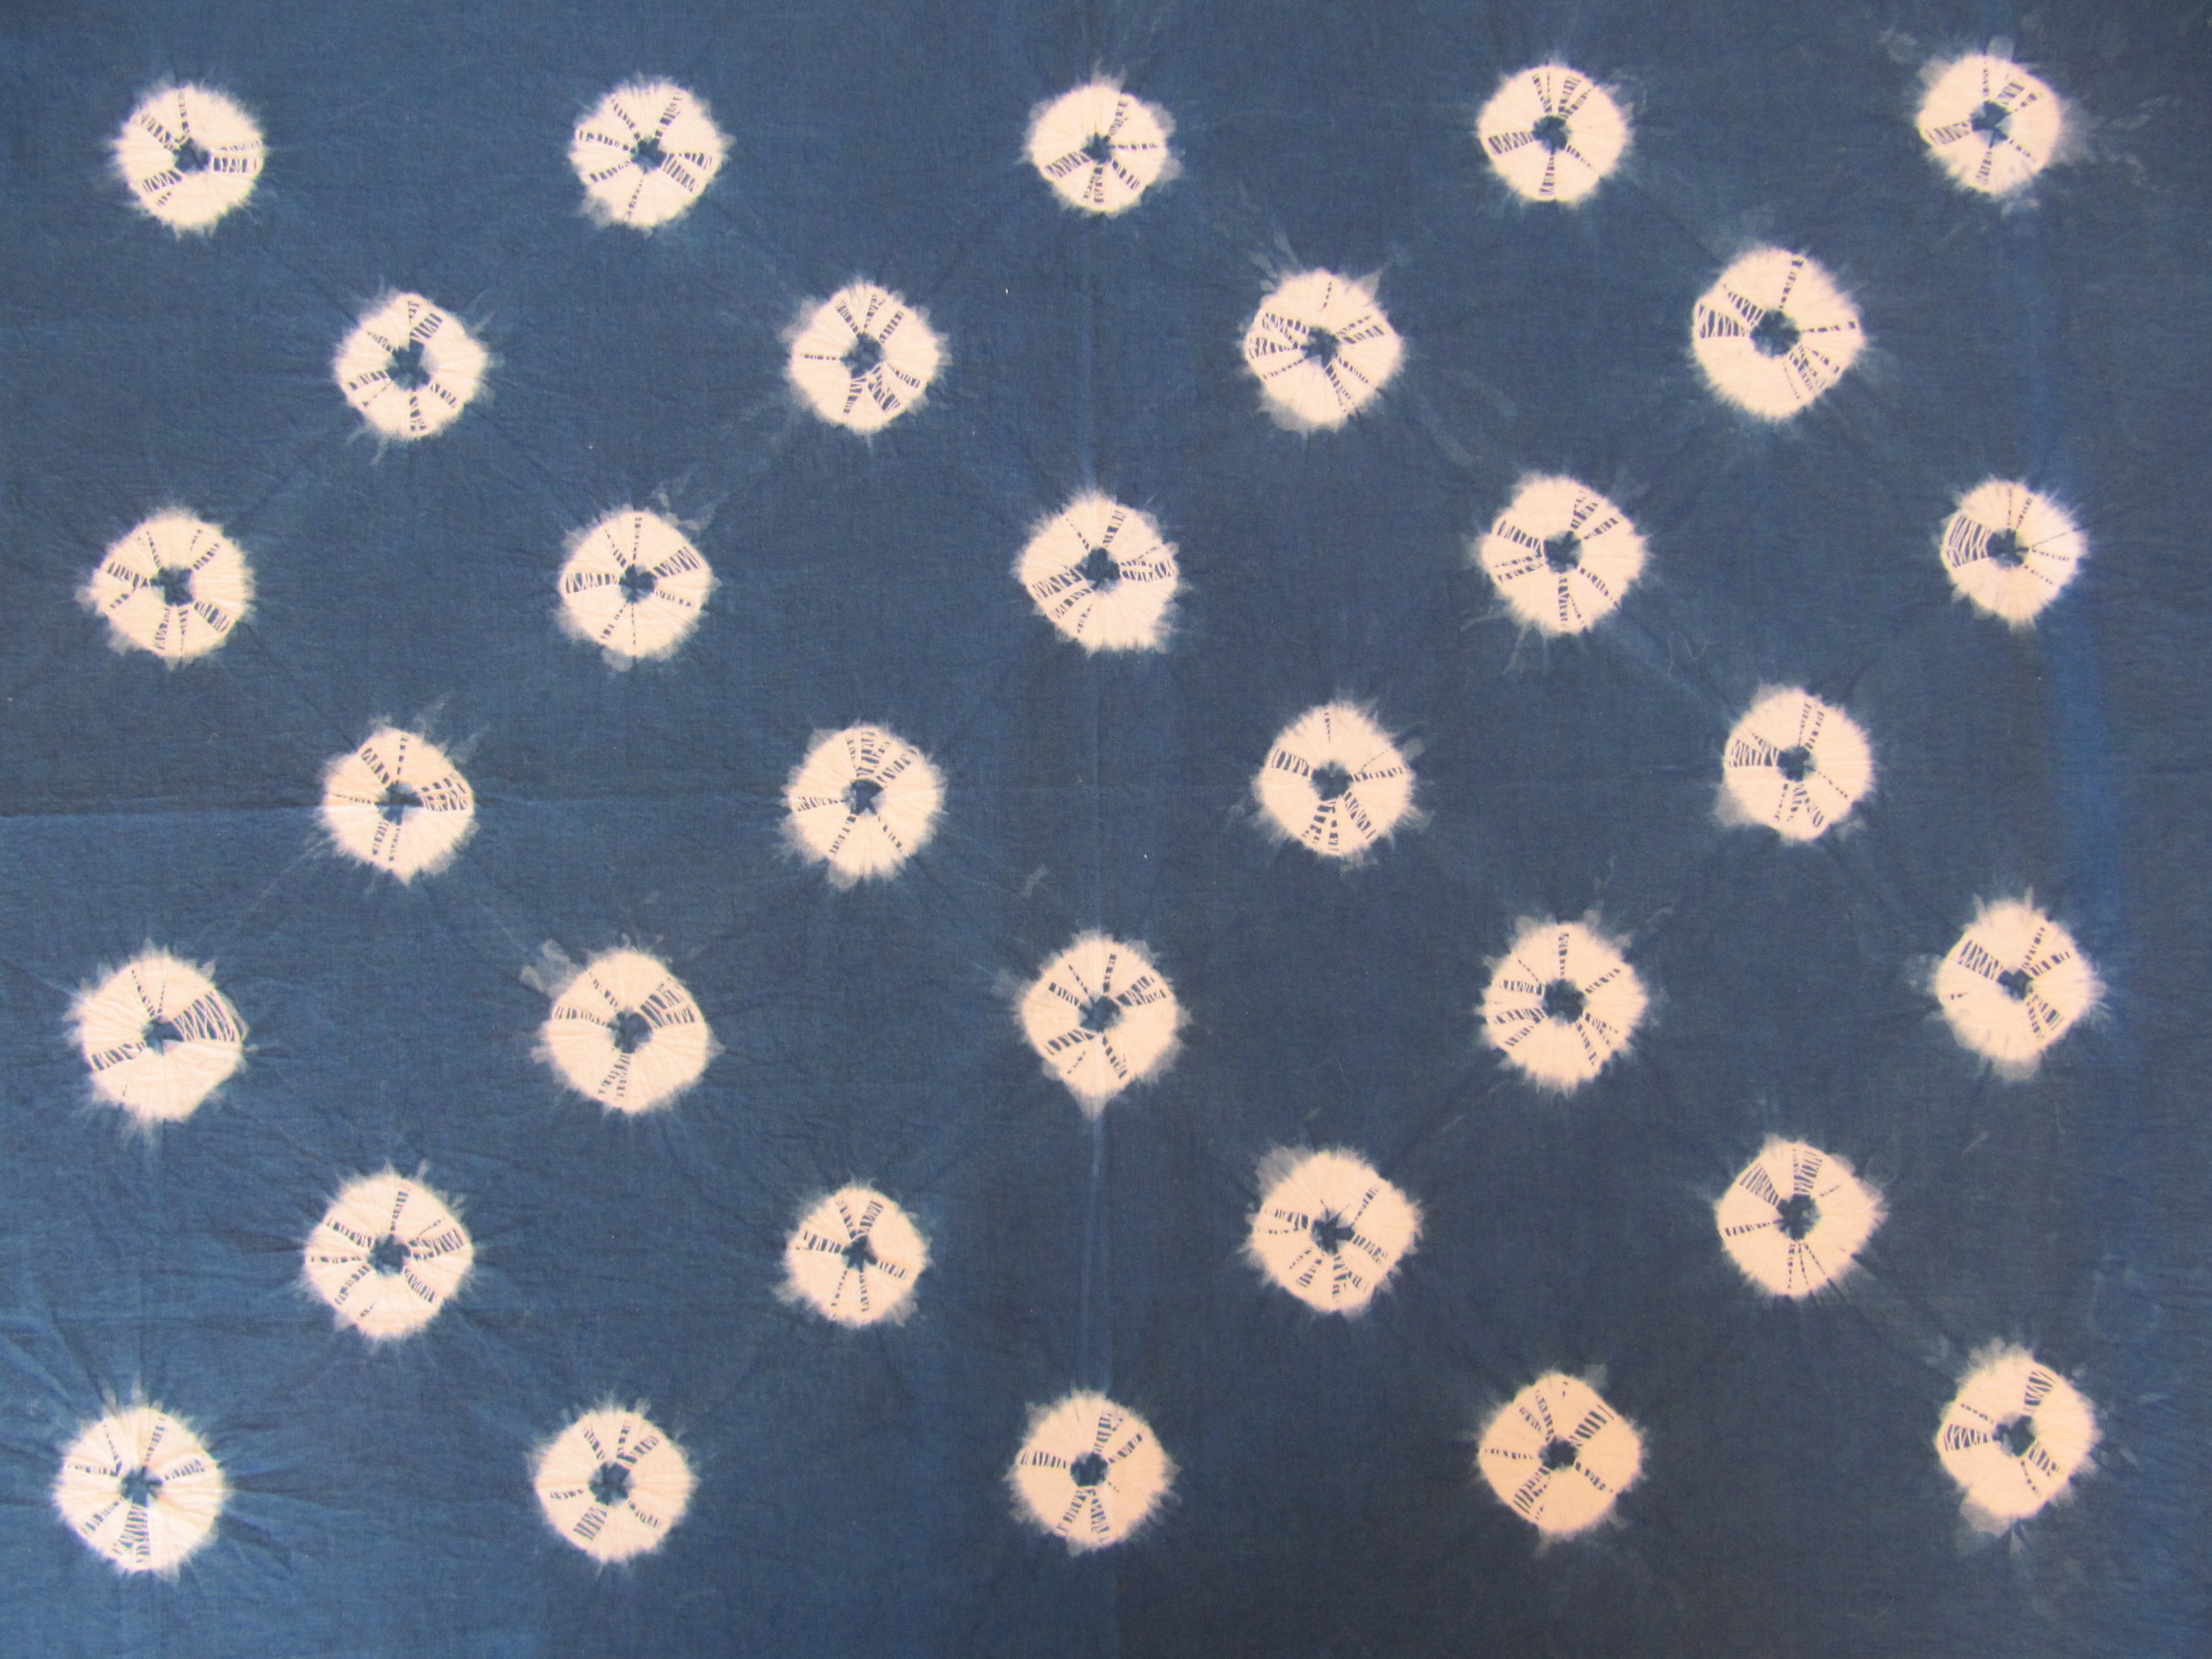
Anywhere indigo-bearing plants grew, local people created traditions of woven and resist- or reserve-dyed textiles using techniques such as ikat, shibori, plangi and batik reflecting culturally specific imagery.

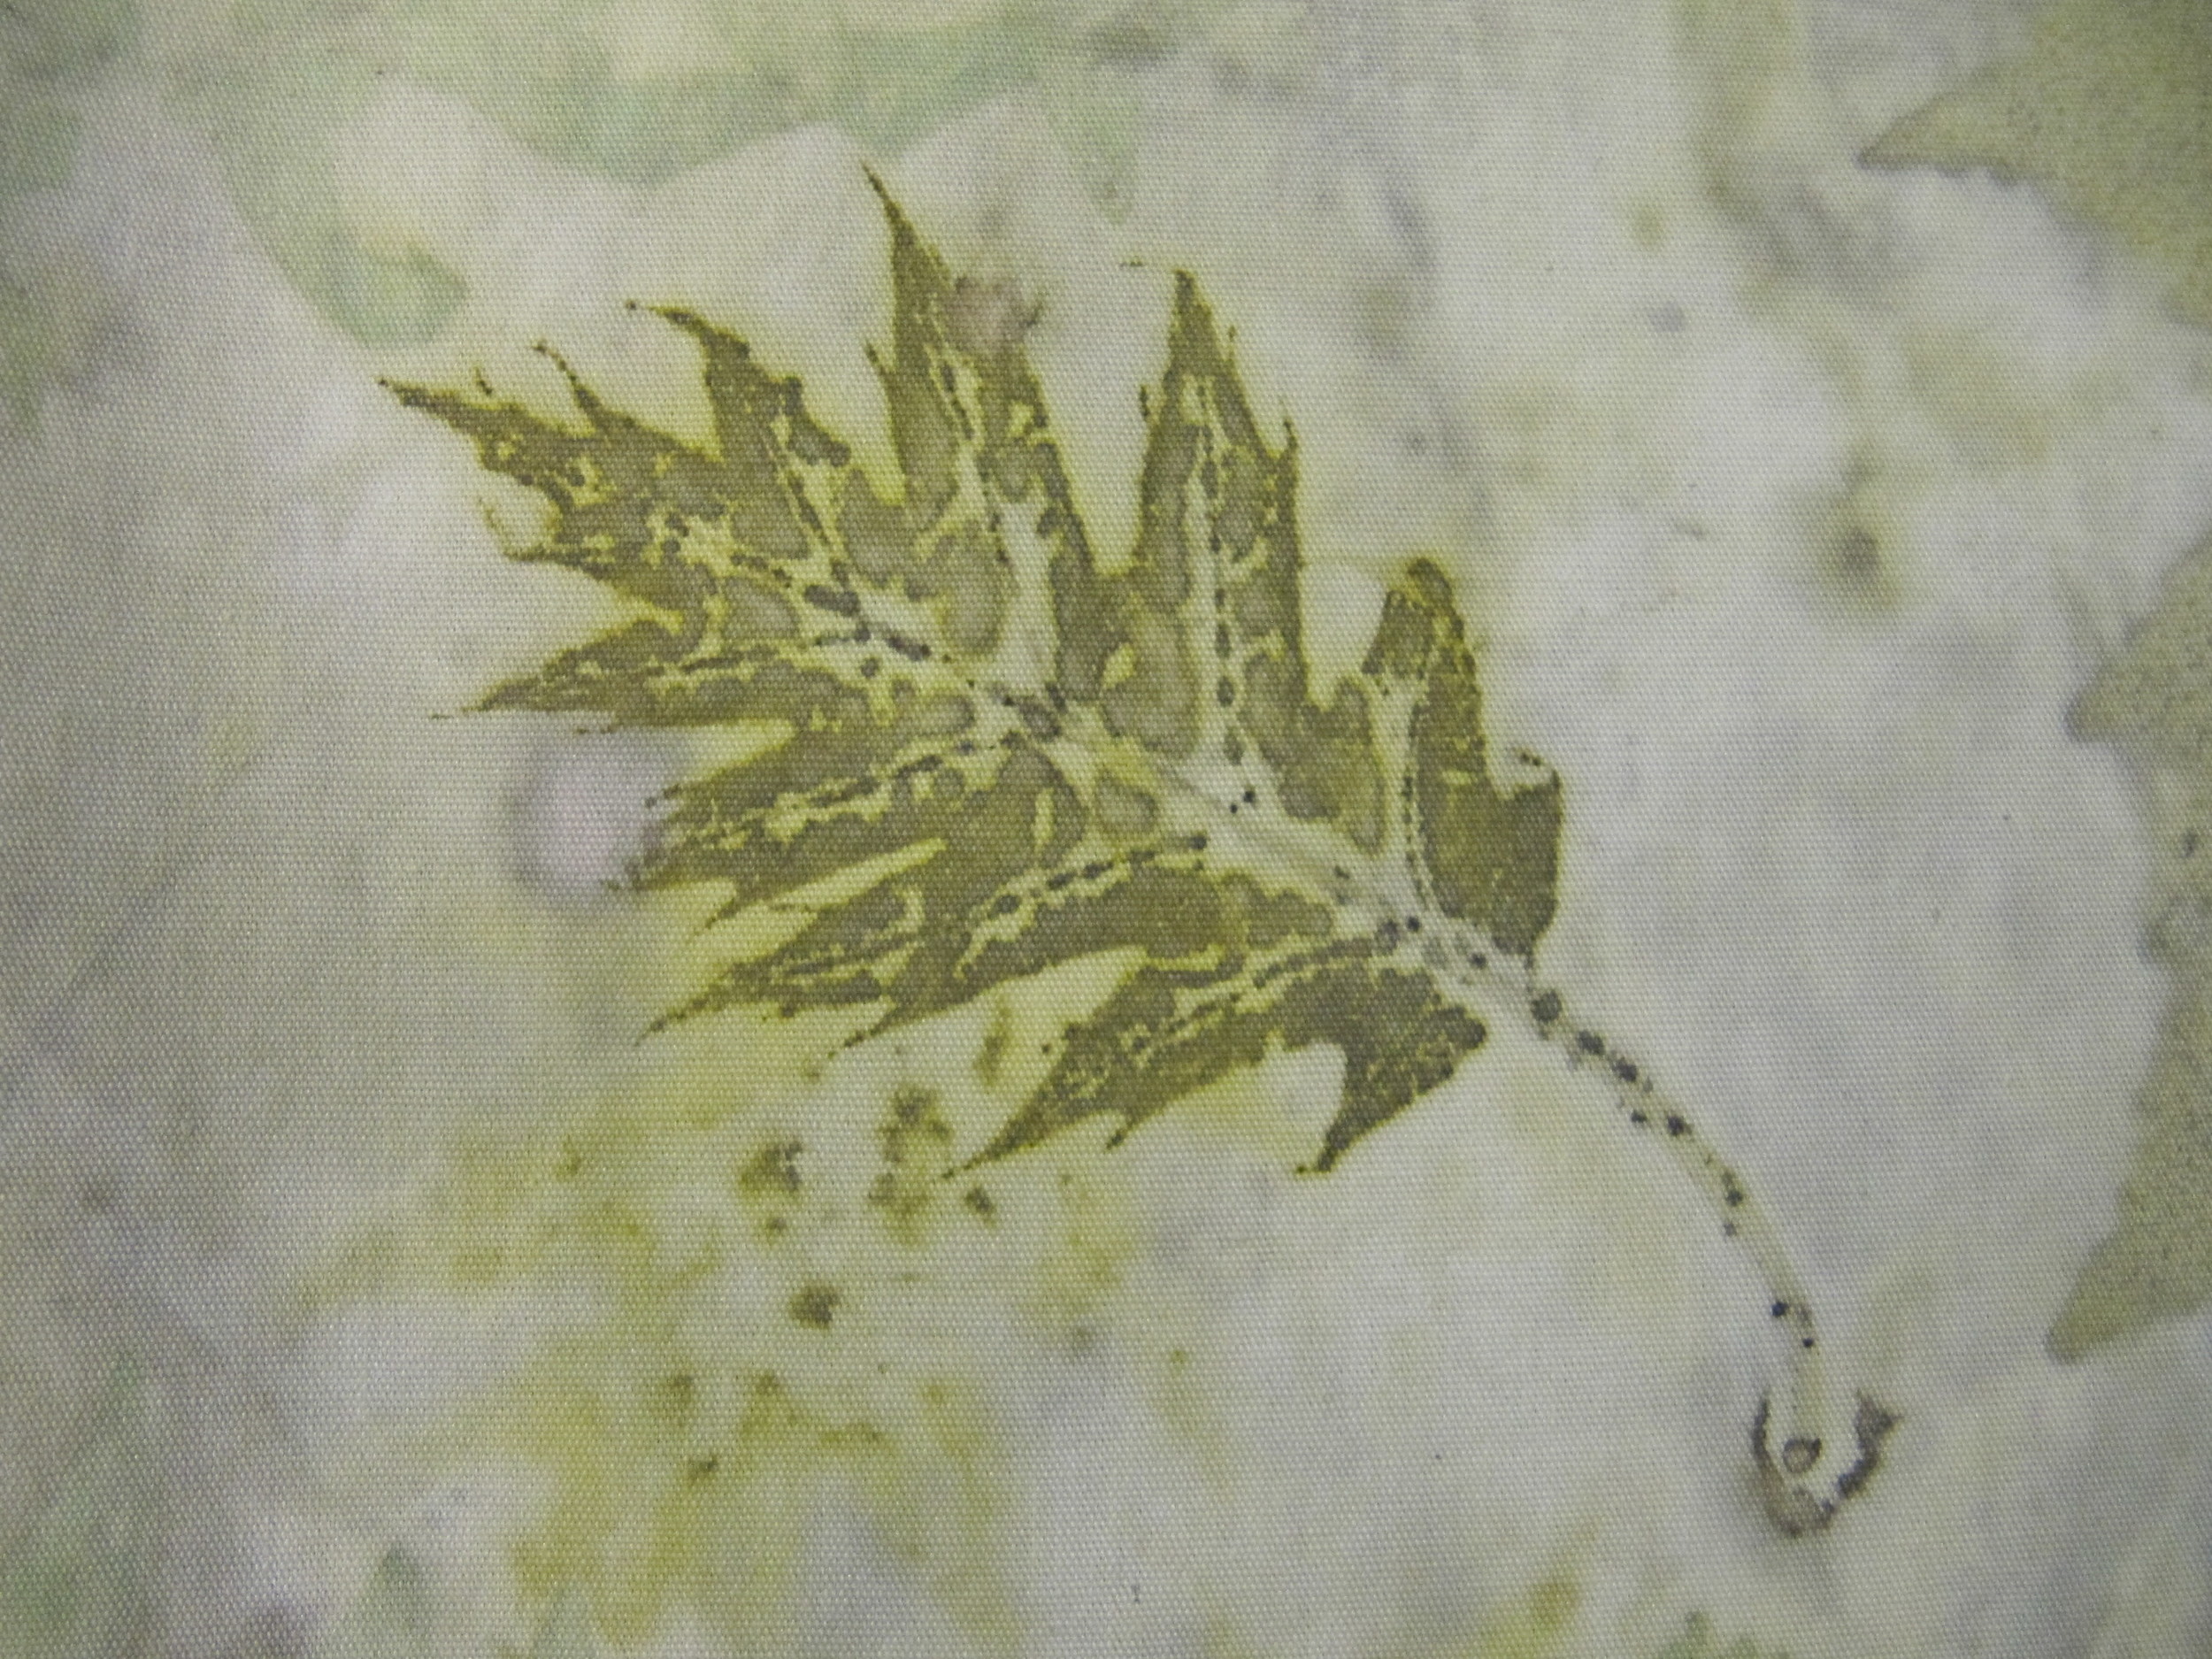
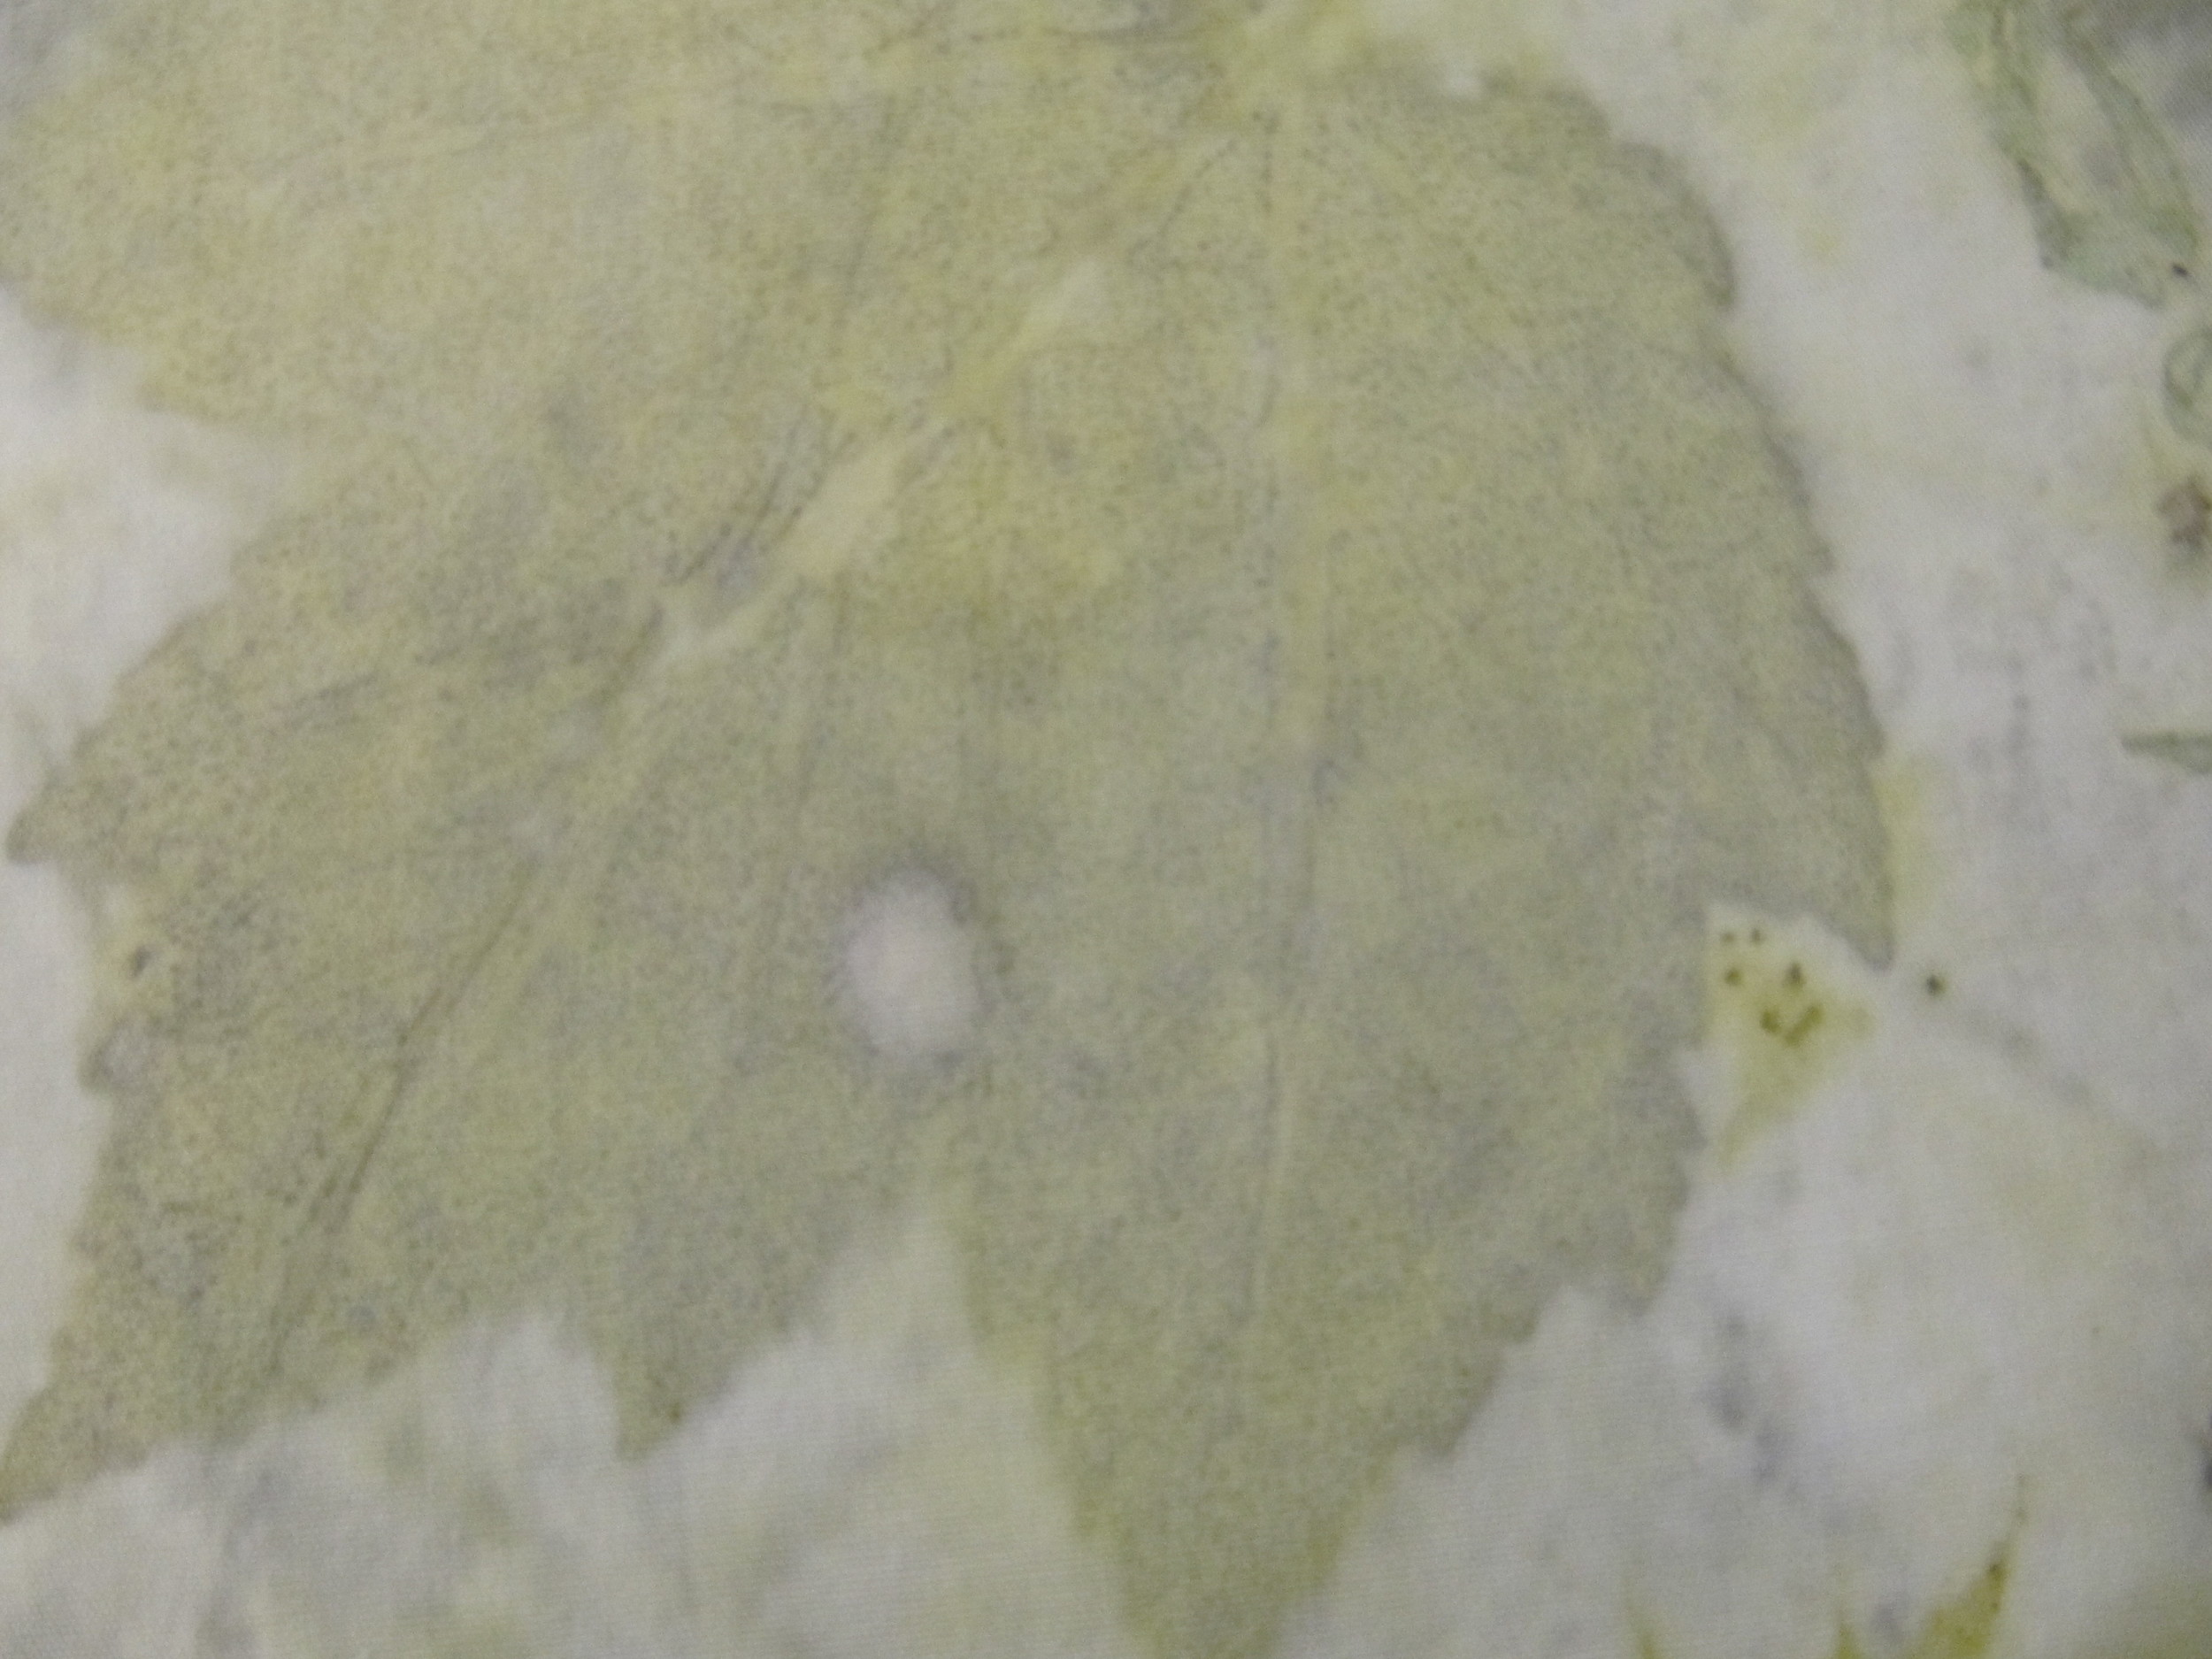
The most recognizable form of blue and white reserve patterning is ​batik​ from Southeast Asia. Melted wax is used to create hand-drawn or printed patterns. After the wax has hardened, the cloth is dyed with indigo. The wax remains solid in the room temperature vat preserving the light-colored design on an indigo ground. Starch pastes or mud can be applied by hand or through stencils to create similar light-dark patterning.

Shibori​, a Japanese term meaning “to squeeze”, encompasses binding, stitching, pleating, and scrunching techniques used to create patterns and imagery. These “tie-and-dye” techniques have practiced by peoples in most regions where indigo dye was available.

By the end of the 19t​ h​ century, natural indigo production could no longer meet the demands of the global textile industry, and a search for synthetic indigo began. In 1897, Germany’s BASF launched ‘Indigo Pure”, and within 15 years natural indigo production was reduced by 95%.

The global obsession with indigo continues with every pair of jeans sold. Though jeans have not been dyed with natural indigo for nearly a century, their “cool” cachet persists. Environmental concerns and an increased demand for natural and sustainable dyes may lead to a resurgence of natural indigo production.

Traditional artisans still look to natural indigo as a dyestuff which​ ​encompasses thousands of years of experience and artistry passed down from generation to generation. Truly, a blue like no other.

(Published May 2017, Making Magazine - Issue 3, Dots) https://makingzine.com/collections/magazine/products/making-no-3-dots

Printing on Paper - update

IMG_6946.jpg

I first posted this article about printing paper in 2015 and have improved upon my process since then! 


I use watercolor and printmaking papers available in art stores. Most are a cold-pressed mid-weight paper. Some of my favorites are:  

Copperplate paper (used for printmaking)

Rives BFK (also a printmaking paper, gives slightly chalky images)

Canson Student Foundation Watercolor (the cheap kind)

Canson Editions

American Masters Watercolor 

Saunders Waterford Rough

Arches Text Wove

and whatever else is on sale or strikes my fancy.  More expensive papers do not make better prints, as far as I can tell.

I typically print on pieces that are 1/16th of a sheet of 22 x 30 paper.  Approximately 5 x 7".  

Step 1:  tear or cut the papers to size 

Step 2:  mordant the paper - papers are made from vegetable fibers, usually cotton and sometimes unspecified cellulose which can be treated the same way.  A mordant creates a permanent bond between the natural color and the fibers to increase the light-fastness and range of colors. I use alum (an aluminum salt used in pickling) in the form of alum acetate, a little iron (rusty nails in 1 part vinegar - 1 part water) and a little copper (corroded copper pipes in the previous type of vinegar solution or a tiny dash of Miracle Grow - which contains LOTS of copper)  The solution should be colorless or slightly orangey-brown.  I use left-over fabric mordant at 15-20% alum acetate, less than 2% iron and less than 1% copper by weight of fabric.  The weight ratio is not critical for paper, just a guide for making a solution.  I used to soak the papers in buckets for 4 to 24 hours.  However, I have learned that simply submerging the paper briefly is just as effective.  This is because the fibers in paper are broken down into tiny bits.  The mordant solution is able to penetrate the fibers quickly. I enter the papers to the solution one at a time to make sure they are fully exposed and allow them to sit in a pile covered in plastic for half an hour before printing or drying for later use.  (Paper may be dried after mordanting and re-wet with tap water before printing.)  

Step 3:  Lay out plant material on damp, but not dripping paper.  Paper, plants, paper.  Paper, plants, paper.  This reduces some of the secondary prints running through and I never have to decide which of two printed sides I prefer.   If I want exceptionally clear prints with no 'background noise' I put a piece of baking parchment paper between the 'sandwiches.' (Paper, plants, paper, parchment, paper, plants, paper, parchment.)

Step 4: I have experimented with a number of methods of steaming, but my current favorite is clamping the pile of papers and plants between two porcelain tiles ($0.99 at Home Depot) and securing them with 2" spring clamps ($1.88 ea).  C-clamps work as well, just tighten slowly and each corner evenly or the tile will break.  I am not trying to crush the leaves, just to have an even contact between the leaves and the papers.  

Step 5:  Steam the whole press.  I use a large turkey roasting pan with a canning jar lifter in the bottom.  I place the clamped tiles on the jar lifter above boiling water, replace the cover and steam for approximately 1 hour.  I un-layer the papers as soon as I can touch the tiles and clamps.  Some practitioners let their pieces sit overnight, but I've found that I get brighter colors if I open them sooner rather that later.  Sometimes the leaves stick to the paper;  just wait until the paper dries and they will peel or scrape off without smearing. Allow the papers to dry flat.  

Remember, you're only committed to several sheets of watercolor paper, experiment, play!  

The Magic of Eco Printing - a few short videos

No matter how many pieces I make, I'm always excited to take the leaves off - here's a little of the magic!  I'm aiming to post several videos per week on Instagram and FB - some with a high geek factor and others just for the joy of them!  Enjoy! Instagram @ecouturestudio


And...a little of the science behind the magic

Indigo Love

This Is What 60 Hours of Intricate Tie Dye Looks Like, blog and video post by Micky Bedell of the Bangor Daily News. (I tried to embed the video, but I think crazy shibori is a better use of my technical capabilities.)

Video:

http://bangordailynews.com/video/this-is-what-60-hours-of-intricate-tie-dye-looks-like/

Made in Maine - Photos and Videos of People Who Create

https://bedell.bangordailynews.com/2017/04/17/home/amelia-poole-indigo-eco-print/

Needle in hand, Amelia Poole hunches over a folding table in the small back room of her Brooksville studio on a chilly winter morning. The heating system sputters and grinds as a nearby window floods the fabric in her hands with light, bringing into sharp focus hundreds of delicate, patterned stitches, gathered bunches and winding string.

This isn’t your typical summer camp tie dye. Not even close.

Adventures in Indigo: I've got the Blues

Indigo was the dye that turned me from a casual user into an addict.  Indigo is magic:  submerge any porous natural substance in the less-than-pleasant-smelling-frog-pond-greeny-yellow vat*, soak for a few minutes, remove from the vat and watch the material change from yellow, to green, through teal to blue in less than a minute.  MAGIC!  (It’s actually simple chemistry, but I’ll get to that later.)

I first saw an indigo vat in use at a linen processing workshop in Rhode Island in 1998 and fell in love.  Within a week I had my own vat.  While I was deliriously dyeing one evening my friend Hannah stopped  by. After I assaulted her with my excitement and demonstrated the dipping and dyeing.  She looked at my bedraggled dye-covered self and asked “Where are your car keys?”


“Um, on my desk.  Why?”  

“I’m going to get us some pizza, because you’ll stay here all night and starve if I don’t.”  

She was right.  Each dip in the vat yielded the same excitement as the first, I was hooked.

Indigo is a plant based pigment derived the leaves of plants.  Are there blue plants?  Not unless we’re on Planet Seuss.  


Much of the world has native plants that produce indigo and more than fifty different species of plants produce indigo in usable quantities. Indigo-bearing plants come from families as diverse as the bean family (leguminosae), cabbage family (cruciferae) and rhubarb family (polygonaceae). Examples of indigo-bearing plants include several species of Indigofera, Japanese Indigo (Persicaria tinctoria and Polygonum tinctorum), woad (Isatis tinctoria), dyer’s oleander (Wrightia), Strobilanthes and Marsdenia.

Indigofera tinctoria - the most 'commercial' form of indigo precursor bearing plant.

Indigofera tinctoria - the most 'commercial' form of indigo precursor bearing plant.

Polygonum tinctorium - Japanese indigo

Polygonum tinctorium - Japanese indigo

Woad - Isatis tinctoria.

Woad - Isatis tinctoria.

These plants contain “indigo precursors” instead of the actual pigment.  They contain the glucoside indican which is extracted from the leaf through fermentation.  Indican breaks down into glucose and indoxyl. Indoxyl is colorless until it undergoes oxidation (through aeration of the fermentation pool) to yield indigotin in the form of a blue, insoluble sludge which is dried and sold in squares before being ground into powder.  (Sorry about the chemistry speak, I’m an artist raised by scientists.)  Marco Polo accurately described this process in during his travels through India in the late 13th century.)

Lump indigo from India - the blue sludge of indigo pigment is dried and sold in blocks

Lump indigo from India - the blue sludge of indigo pigment is dried and sold in blocks

Before use, lump indigo must be ground into a fine powder.

Before use, lump indigo must be ground into a fine powder.

In order to be an effective, permanent dye the indigo pigment must be turned into a yellow substance known as leuco-indigo or indigo white.  This dye bath is called a vat.


Indigo vat - the coppery blue foam on the top of the vat is called the “Indigo Flower” and is the result of indigo from the vat oxidizing when it touches the air.

Indigo vat - the coppery blue foam on the top of the vat is called the “Indigo Flower” and is the result of indigo from the vat oxidizing when it touches the air.

Blue indigo is dissolved in an alkaline solution (usually created with lye from wood ash) and then reduced (all extra oxygen is removed from the vat liquid and some of the H2O molecules break down).  This yields a dye which will penetrate fibers and create a permanent dye after exposure to the oxygen in the air.  

I had some fits and starts with vat creation and accurate, permanent dyeing including turning my boss blue when I dyed a dress for her.  I’ve now been dyeing with indigo for 18 years and create beautifully dyed yarns, clothing and indigo shibori textiles - but that’s another story.  

Mokume indigo shibori - Wood Grain Pattern

Mokume indigo shibori - Wood Grain Pattern

Stitch and Bind "Sea Urchins"

Stitch and Bind "Sea Urchins"


Printing Paper

Acer palmatum 'Bloodgood', Bidens 'Big Eye' and Red Sand Cherry on Copperplate paper

Acer palmatum 'Bloodgood', Bidens 'Big Eye' and Red Sand Cherry on Copperplate paper

I use watercolor and printmaking papers available in art stores. Some of my favorites are:  

Copperplate paper (used for printmaking)

Rives BFK (also a printmaking paper, gives slightly chalky images)

Canson Student Foundation Watercolor (the cheap kind)

Canson Editions

American Masters Watercolor 

and whatever else is on sale or strikes my fancy.  More expensive papers do not make better prints, as far as I can tell.

I typically print on pieces that are 1/16th of a sheet of 22 x 30 paper.  Approximately 5 x 7".  

Step 1:  tear or cut the papers to size 

Step 2:  mordant the paper - papers are made from vegetable fibers, usually cotton and sometimes unspecified cellulose which can be treated the same way.  A mordant creates a permanent bond between the natural color and the fibers to increase the light-fastness and range of colors. I use alum (an aluminum salt used in pickling) in the form of alum acetate, a little iron (rusty nails in 1 part vinegar - 1 part water) and a little copper (corroded copper pipes in the previous type of vinegar solution or a tiny dash of Miracle Grow - which contains LOTS of copper)  The solution should be colorless or slightly orangey-brown.  I use left-over fabric mordant at 15% alum, less than 2% iron and less than 1% copper by weight of fabric.  The weight ratio is not the same for the paper, just a guide for making a solution.  I usually soak my papers for 4-24hours but you can also paint a mordant solution the surface of your papers with good results.  I enter the papers to the solution one at a time to make sure they are fully exposed.  Paper may be dried after mordanting and re-wet with tap water before printing.  

Step 3:  Lay out plant material on damp, but not dripping paper.  Paper, plants, paper.  Paper, plants, paper.  This reduces some of the secondary prints running through and I never have to decide which of two printed sides I prefer.   If I want exceptionally clear prints with no 'background noise' I put a piece of baking parchment paper between the 'sandwiches.' (Paper, plants, paper, parchment, paper, plants, paper, parchment.

Step 4: I have experimented with a number of methods of steaming, but my current favorite is clamping the pile of papers and plants between two porcelain tiles ($0.99 at Home Depot) and securing them with 2" spring clamps ($1.88 ea).  C-clamps work as well, just tighten slowly and each corner evenly or the tile will break.  I am not trying to crush the leaves, just to have an even contact between the leaves and the papers.  

Step 5:  Steam the whole press.  I use a large turkey roasting pan with a canning jar lifter in the bottom.  I place the clamped tiles on the jar lifter above boiling water, replace the cover and steam for approximately 1 hour.  I un-layer the papers as soon as I can touch the tiles and clamps.  Some practitioners let their pieces sit overnight, but I've found that I get brighter colors if I open them sooner rather that later.  Sometimes the leaves stick to the paper.  Just wait until the paper dries and they'll peel off.  

Remember, you're only committed to several sheets of watercolor paper, experiment, play!  


Eucalyptus

I have been eco-printing for 5 years, and have not used any eucalyptus until last month.  Much of India Flint's work focuses on the use of Eucalypts, native to her South Australia.  I have been tempted, but since it does not grow here in the frozen north, I have concentrated on using only local plants and not ordered or purchased any.   But, thanks to Haystack Mountain School of Crafts Winter Mentor Program, my students and I were able to play with some.  Haystack offers the unique opportunity for high school students to work with local artists in their studios during the winter months.  In the past, I have taught nuno felting and Indigo shibori, but this year, I decided to throw caution to the wind and do eco-printing with materials from the florist. 

I ordered some Seeded Eucalpytus (latin name?) from Fairwinds Florist and Red Ironbark (Eucalyptus sideroxyion) leaves and stems from Pineneedlesweetgrass on Etsy. (S., of Pineneedlesweetgrass gathers the Eucalyptus near her home in the Santa Cruz Mountains of California.)  When the package arrived a few days later, the blossoms were still fresh and vibrant - my lovely assistant commented that she didn't know that summer could come in a bag.  Any fresh vegetation was more than welcome during this excessive winter!

Eucalyptus sideroxyion leaves and blossoms on unmordanted felted knit merino wool.  These are the oranges that everyone falls in love with!  I love the definition of the seeds pods and blooms as well.

Eucalyptus sideroxyion leaves and blossoms on unmordanted felted knit merino wool.  These are the oranges that everyone falls in love with!  I love the definition of the seeds pods and blooms as well.

Eucalyptus sideroxyion  and seeded eucalyptus on unmordanted silk organza.   

Eucalyptus sideroxyion  and seeded eucalyptus on unmordanted silk organza.   

Seeded eucalyptus on spun silk broadcloth, hot mordanted with alum, iron and copper.   Print by P. J. Z.

Seeded eucalyptus on spun silk broadcloth, hot mordanted with alum, iron and copper.   Print by P. J. Z.

Eucalyptus sideroxyion leaves and blossoms on organic cotton muslin cold mordanted with aluminum acetate, iron and copper.

Eucalyptus sideroxyion leaves and blossoms on organic cotton muslin cold mordanted with aluminum acetate, iron and copper.

Eucalyptus sideroxyion on washed wool crepe mordanted alum, a little copper and a tiny bit of iron.  The cloth was ever so slightly green after mordanting.  I love the definition of the flowers.

Eucalyptus sideroxyion on washed wool crepe mordanted alum, a little copper and a tiny bit of iron.  The cloth was ever so slightly green after mordanting.  I love the definition of the flowers.

Close up of Eucalyptus sideroxyion blossom on mordanted spun silk broadcloth.

Close up of Eucalyptus sideroxyion blossom on mordanted spun silk broadcloth.

Seeded eucalyptus on alum mordanted silk organza.

Seeded eucalyptus on alum mordanted silk organza.

I was afraid that I would fall hopelessly in love with eucalyptus and want to use it all the time.  The results are lovely!  But, I am really looking forward to spring and my local plants that yield amazing color and imagery too.

PS - I found several extraordinary orange printers last year.  Slogging through ditches appeals to me much more than ordering leaves!  

Devil's Beggars Tick (Bidens frondosa) on THSaunders Watercolor Paper (with goldenrod buds)

Devil's Beggars Tick (Bidens frondosa) on THSaunders Watercolor Paper (with goldenrod buds)

Coreopsis verticillata on cotton - table runner bordered with shot cotton. 

Coreopsis verticillata on cotton - table runner bordered with shot cotton. 


Paper!

I've always admired other eco-printers paper prints and have experimented a little.  But, now, I am obsessed.  Of course, paper, especially high quality paper, is made from cotton or linen fibers - textile!  Even the other cellulose fibers that make up most paper are dyeable as well.  If I expect them to be dyeable, I need to mordant them.  I have an enormous restaurant stock pot out in the greenhouse at the studio filled with a some alum (half potassium alum and half aluminum acetate) several vinegar-ed rusty items and two corroded copper pipes.  Soak for 24 hours.


Open for the Season!

Ecouture Textiles - Shop and Studio is OPEN for the season.  Tuesday-Saturday 10am-4pm.  Please visit the contact page for more information and directions.

New this year - gorgeous hand block-printed signs, alphabets and heart garlands made from recycled children's book pages and art papers by Michele Levesque of Sargentville.  Each one is unique!

New this year - gorgeous hand block-printed signs, alphabets and heart garlands made from recycled children's book pages and art papers by Michele Levesque of Sargentville.  Each one is unique!

This winter, I thought a great deal about blogging, but, obviously didn't do it.  Here is a little photo tour of the past few months.

The newly re-painted and organized work room!  It took me almost three weeks to replace the previous oatmeal and jaundice color palette with three coats of  "Atrium White", "New Avocado", and "Autumn Purple."

The newly re-painted and organized work room!  It took me almost three weeks to replace the previous oatmeal and jaundice color palette with three coats of  "Atrium White", "New Avocado", and "Autumn Purple."

The workroom is always open.  Please come and visit to see what I'm up to!

I occupied myself this past (long and really cold) winter with Indigo!  

Of all natural fibers, I've found cotton the most challenging to dye.  I think I've got it now!  I am excited to be offering eco-printed pimatex cotton for quilters in 1/4 and 1/3 yard pieces.  Larger pieces are available on request.


Crimson King maple and Grey birch leaves on Pimatex Cotton

Trying to get in touch...

I am trying to get in touch with CS (from SIAD) who sent me an email via this site.  I was unable to reply to your email, it bounced back and I can't find another address.  Please email me at ecouturestudio(at)gmail.com.  I have a reply for you!

PS - Everyone else...my next post will be on Indigo - SOON!  

Time flies when you're really, really busy!

It's apparently been 2 1/2 months since I last wrote an entry.    But, this is what I've been doing in the meantime!

The Shop in progress.

The Shop in progress.

The studio at 30 Bagaduce Road was in excellent shape.  I didn't need to repaint,  I just washed everything - floor, walls etc.  And....ta-da!!!

Eco Printed Linen Tunic, Nuno Felt Scarf or Hanging (natural colored supefine merino wool, tussah silk, backed with cashmere) - oh yes, and the jade tree I've been dragging around with me for 12 years.  It seems to be very happy here.

Eco Printed Linen Tunic, Nuno Felt Scarf or Hanging (natural colored supefine merino wool, tussah silk, backed with cashmere) - oh yes, and the jade tree I've been dragging around with me for 12 years.  It seems to be very happy here.

Nuno felted shawls

Nuno felted shawls

Eco Prints, Nuno Felt and Indigo Shibori Wall Pieces
Indigo Scarves
Magic Wands - handmade nuno felt, ribbons, lots of magic!  My lovely assistant almost turned me into a duck!

Magic Wands - handmade nuno felt, ribbons, lots of magic!  My lovely assistant almost turned me into a duck!

Heart Garlands by Michele Levesque.  These gorgeous garlands are made from recycled book pages and origami paper, sewn with cotton thread.

Heart Garlands by Michele Levesque.  These gorgeous garlands are made from recycled book pages and origami paper, sewn with cotton thread.

New Studio!!!

Please accept my apologies for the recent blog silence - I have a NEW studio!  And actual physical studio (that is not the attic) with a shop attached.  I'll write more soon and post photos, but I am still cleaning and organizing.  

India Flint Video - Being (t)here

Here is a link to a video by India Flint and Tracy McConnell-Wood following India's Artist's Residency at Big Cat Textiles in Newburgh, Fife., Scotland. August 2013.  It's a lovely meditation on capturing time and place.  

http://vimeo.com/76207100

Check out Big Cat Textiles and the Hat in the Cat - very cool studios, workshops and masterclasses - ahhhh, Scotland.  

http://textilecentre.co.uk/?page_id=94


Against the clock

Despite being gifted a terrible cold by my lovely assistant (who, luckily, did not feel as bad as I did), I made some eco printed scarves this week.  We've had gorgeous, unseasonably warm weather and some leaves are still printing nicely.   

Silver maple is always  amazing; black walnut (photos to follow) and yellow birch are still looking good.  I also grabbed some red sand cherry leaves.  In the early parts of the summer they yield a teal/blue color with occasional splashes of pink.  I didn't expect much of them because they were quite dry.  The blue is grey-er than teal, but there are more blotches of pink.  

I've steamed, dried and steam-ironed the pieces, but I am going to let them sit as long as possible before washing.  Here's why:  If I wash a piece soon after it's printed a lot of color comes out in the wash water.  I haven't noticed discernible changes in the visual color of the print, but, after three weeks of aging (after steaming, drying and steaming with an iron) a lot less color leaches into the wash water.  So, more must be sticking to the cloth, and that's a good thing.  

I am getting ready to send almost 50 pieces to ARTISTRY at the Guildford Art Center in Guildford, Connecticut.  This is my 3rd year participating.  My work is also in the Art Center Shop throughout the year. 


Silver maple and flat-topped aster, detail.

Silver maple and flat-topped aster, detail.

To do is to know

The first day of Uni at SIAD we were reminded of a Chinese Proverb (attributions vary) "To hear is to forget.  To see is to remember.  To do is to know."     

I had a great time DOING on Friday afternoon with the 5th and 6th grades at Brooksville Elementary School.  (10 kids total - my lovely assistant has a large kindergarten class; 7 students.)  

It was  warm Friday afternoon and we were all a bit, nevermind, really  tired.  But after a quick description of eco-printing and a discussion of place as integral to my work, we went outside and gathered leaves and flowers from around the school yard.  We returned to the classroom, pushed the desks together to make a large table and laid out the cloth.  We had one piece of silk fabric (2 yds. 16mm habotai) and one piece of linen (2yds. 4.7 oz. linen).  The students surrounded the table and laid out their collected plant materials.  We're all excited to see how the monster-sized sunflower leaves will turn out.  But,  using sunflower heads in a traditional dye bath (simmering etc.) yields green.  (See A Dyer's Garden  by Rita Buchanan, Interweave Press, 1995.)   I was seeing bits of bright green marking the cloth as a bound the bundles.  

The kids rolled up the cloth then rolled the 'snake' into a 'ball'.  I did the binding; they were pretty much done at that point.   

I took the bundles home over the weekend to heat process them.  I simmered the linen bundle in tea-infused water (it's a great way to get rid of the icky tea you bought by accident, or were given...)  The tannin in the tea reacted with the iron in the linen mordant and added some dark brown patterning to the piece.  I did my same-old steaming method with the silk bundle - balanced on a wide-mouth jelly jar above boiling water in a canning kettle.  Processing done, I left them on the back steps to cool overnight.  

When I delivered my lovely assistant to school this morning, I dropped off the bundles too.  Mrs. L. said they were going to unwrap them today for a fun activity and some real learning before they settle down to the NECAPS (standardized testing:  actual education to resume next week.)  The kids are going to open the bundles on the playground and compost the used leaves etc. in the bushes and discover what their presents look like.  I'll take the pieces home with me tonight and finish them off.  Voila!  The 5th and 6th grades at Brooksville Elementary have captured a piece of their geography:  September 27th, 2013.

Here are some photos of the finished pieces:


Fantastic Job 5th and 6th grades!!  - I'm marking some of the leaf prints with their leaf of origin.

Fantastic Job 5th and 6th grades!!  - I'm marking some of the leaf prints with their leaf of origin.

Back of a Staghorn Sumac Leaf - lovely!

Back of a Staghorn Sumac Leaf - lovely!

Linen is a plant fiber (bast or vegetable fiber) and takes color less readily than silk.   But the students got LOTS of color on there!  Well done! 

Linen is a plant fiber (bast or vegetable fiber) and takes color less readily than silk.   But the students got LOTS of color on there!  Well done! 

And another image of the linen piece!

And another image of the linen piece!

Geography and Me

This afternoon I will be working with the 5th and 6th grade students at Brooksville Elementary School.  They are currently studying geography, but as more than just places on the map.  The kids are learning about how geography affects people (and how we in turn affect the places we live.)  They're studying food, industry and art.  I am the art part.  We'll be discussing how most artists are in some way inspired by their surroundings - not necessarily landscapes - the big picture (so to speak.)  

My work is directly connected to where I live.  I create lovely cloth directly from my surroundings.  I use ocean water and found copper and iron in my cloth preparation.  All of my prints are made with local plant material.   The predominant colors are greys, yellows, greens and browns - some purple-mauve too.  They are the colors of this place.  I've read about eco-printers who order eucalyptus (which print a range of reds and purples) from the florist.  I've resisted the temptation and focus heavily on the bio-regional resources of the Maine Coast.  

The class will be printing two pieces of cloth - one silk and one linen - with plants gathered from the playground area.  I have pre-mordanted the cloth but carry with me my rusty iron and vinegar soaked pennies for demonstration purposes.  The students will be making the bundles.  To save the wrath of the kitchen staff,  I'll bring the bundles home and steam the silk and simmer the linen.  We'll unwrap on Monday and they'll be hanging in the classroom by Friday of next week!!  

PS - I am banging my head against the wall with the particulars of e-commerce - each piece listed in my shop also comes with a note on how to actually  purchase it.  I'm working out the bugs (and fees).


After the Fair

The Maine Organic Farmers and Gardeners Association Common Ground Country Fair in Unity, Maine is awesome.   It's huge - visit two farmers' markets, display gardens, seed companies, green products galore, spinners, the fiber tent, composting 101-501, the poultry barn, sheep dog trials, bunnies, goats, horses, oxen and cows,  Maine kids' enterprise tent, children's area and a garden parade twice a day - and fine crafts.  

I was in the BIG tent with the likes of Chris Leith of Eggemoggin Textile Studio, Jody Johnstone Pottery, Nisa Designs (Jewelery), and more.  After a sweaty set-up on Thursday, the real fun began on Friday at 9am.  I only left my 100 square feet twice that day!  Basically, I talked, non-stop for three days, good think I used to talk and teach for a living.  I LOVE the look on people's faces when I explain the process and they realize that all of the images are made with ONLY the natural pigments in the plant material. Saturday saw 27,000 visitors (I kid you not!!) and the 5th birthday of my lovely assistant.  Sunday brought torrential rains, but the crowds were there again, just in full foul weather gear; this is  Maine after all.  

Huge thanks to M. and M. for the loan of their tables and Chris and Bill Leith for the booth structure.  

I'm finally awake again and the van is unloaded and all loans of furniture returned.  Tomorrow I'll be finishing up the eco-prints for the year - after we get a frost, the leaves are too tired to print any more.  Then it's on to more indigo and felt.  


Pieces of Production

 'Tis the season of ironing, lots of ironing.  True, eco-prints need to age (more on that another time) but, it's much more fun to start something than finish.  Right?  

At Uni (SIAD) several very wise women  taught me that the process of 'making' has three parts (design and sampling notwithstanding).  Preparation, the 'action' (weaving, printing, you name it), and the finishing.  Each piece of the process should take about a third of the total time.   If you skimp on the preparation, your finished piece will be lacking, no matter how much time and effort you put into the act of making.  Loom state cloth and crusty prints aren't particularly nice until they are well finished.  

So, I am ironing, washing and ironing again and enjoying this part of the process.  I get to look at the details of my prints again, assess what really worked and what didn't turn out as I'd anticipated or hoped, or was just a surprise.   The cloth goes from slightly smelly, kind of crusty-feeling stuff to sensuous scarves that want to be worn.  Love the process.

You asked for it...

Since I started my business, people have been asking "Do you have a website?"  My reply:  "No, I have a 3-year-old." / "No, I have a 4-year-old."  But, now I have a 5-year-old full-time kindergartner - AND a website...and a blog! 

Mostly, I'll be writing about my adventures with the art and science of creating eco-friendly textiles here on the Coast of Maine.  I will highlight the work of amazing artists and eco practitioners and any other cool things that catch my brain-waves.   So - here we go!

I will be scrambling for the next few weeks to get ready for the MOFGA Common Ground Country Fair in Unity, Maine - September 20, 21 and 22.  I am in the BIG craft tent - Indigo Moon Textiles (changing signs is slower than email addresses!).  Stop by and see my latest eco-printed silk scarves, linen scarves (new this year!), rust prints, naturally dyed nuno felt and indigo Shibori scarves and art.  


Indigo Moon Studio Booth at The Common Ground Country Fair, 2012

Indigo Moon Studio Booth at The Common Ground Country Fair, 2012